I don't usually send you to read articles, stories or blogs. There's a lot out there for you to choose from. But in this case, LiveScience got it right!
GOOD FOOD GONE BAD
http://www.livescience.com/11341-good-food-bad.html
Read it. Live it. Love it.
Friday, December 16, 2011
Organic Maple Syrup
You might be asking... Why maple syrup? Why organic?
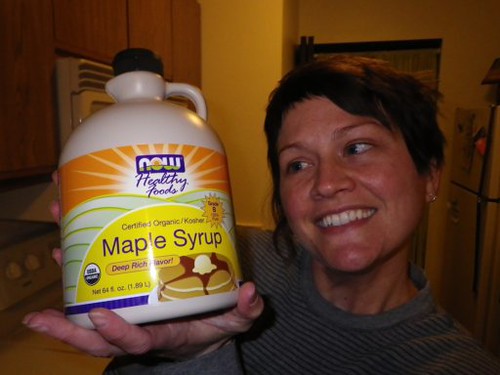
It's the same reason I'm always telling you to avoid any foods that are white. You know, white sugar, white salt, white flour.. you get the idea. Those foods are processed to the extreme. Their trace minerals and micronutrients are completely removed and a few of our government-regulated vitamins and/or minerals are added back.
Why? The food is ruined already! You've heard of the 'diseases of the rich'? Well, America is rich. And it's sick. The reason? Processed foods.
Taken from: www.whfoods.com :
100% maple syrup provides is an excellent source of manganese and a good source of zinc! The trace mineral manganese is an essential cofactor in a number of enzymes important in energy production and antioxidant defenses. Endothelial membranes low in zinc are much more prone to injury. Additionally, studies have found that in adults deficient in manganese, the other trace mineral amply supplied in maple syrup, the level of HDL (the "good" cholesterol) is decreased. Zinc and manganese are important allies in the immune system. Many types of immune cells appear to depend upon zinc for optimal function.
A 1/4 cup serving of maple syrup - which is a surprisingly large amount! - can vary from 150-200 calories (depending on the grade/darkness). So, enjoy without guilt!
A few quick serving ideas from www.whfoods.com :
Maple syrup, used in place of table sugar as a sweetener, gives tea and coffee a unique taste.
Pour some maple syrup on oatmeal topped with walnuts and raisins.
Add maple syrup and cinnamon to puréed cooked sweet potatoes.
Combine maple syrup with orange juice and tamari and use as a marinade for baked tofu or tempeh.
Spread peanut butter on a piece of whole wheat toast, top with sliced bananas and then drizzle maple syrup on top for a sweet, gooey treat.
Friday, December 9, 2011
Mexican throw-together casserole
Want to eat more and weigh less? Eat like this!

Trying to make a yummy, melt-in-your-mouth, warm, hearty, low-fat dinner... I had to plan ahead (about an hour)... but it was definitely worth it!
INGREDIENTS
Red beans
OPTIONAL: Taco meat (made from frozen burgers - or use TVP or boca frozen crumbles)
Frozen corn
Rotel (in a can)
2 medium potatoes, your choice
5-7 small corn tortillas
Enchilada sauce (we used green)
I made red beans from scratch but you don't have to. (However, I recommend it because it's easy, with no additives, no added salt!) Just cover beans with a few inches of water. Bring to boil. Keep on medium boil for 1-2.5 hours, depending on your elevation and how many you're cooking. Just check on the beans every 45 minutes - 1 hour. Taste a bean. Are they done? If not, just keep going. Add more water as needed. See how easy that is?
Now, here's where the preparation is needed. Just rinse and dice your potatoes. (Smaller pieces cook faster.) Now, bake at 375 or so, for 30 minutes. Turn your potatoes. I've also found that it helps to put water in the pan, or put a cup of water in the oven when baking. This will keep your potatoes moist. (This time I just filled the baking pan with water halfway up the potato pieces.) No, really. It works!
Cook your TVP or thawed boca burgers (that you've cut into small pieces) with taco seasoning. You can find a recipe to make your own online or use a premade package. (Just be careful because those are full of all kinds of preservatives and ingredients you can't pronounce!)
While that's all cooking, you'll want to slice up your tortillas. Open your rotel. Drain/rinse your beans. Get your corn out of the freezer or shave it right off the cob.
Can you see how easy this is?
The only thing you're waiting on is the potatoes. So, once they're mostly cooked just start layering:
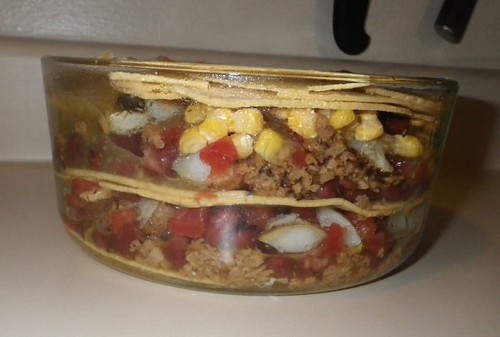
Spread a thin layer of oil in your bowl to prevent sticking. Then go to town! We started with corn tortillas, then layered a bit of everything else. Don't forget to put a few spoonfuls of enchilada sauce in each layer. More corn tortillas, more layers. Then a top layer of tortillas again. Top off with a few spoonfuls of enchilada sauce again.
Preheat oven to 375.
Cover with foil and bake 20-30 minutes. With the glass container you can watch for the sauce inside to boil. When that happens, remove foil and bake until brown on top (another 20 or so minutes). Top with Daiya if you want - but it's not really necessary.
I thought there would be leftovers -- but trust me, there is no way you could leave this dish alone. We certainly didn't. So, go ahead and stuff yourself.. guilt-free.
YUM!
Trying to make a yummy, melt-in-your-mouth, warm, hearty, low-fat dinner... I had to plan ahead (about an hour)... but it was definitely worth it!
INGREDIENTS
Red beans
OPTIONAL: Taco meat (made from frozen burgers - or use TVP or boca frozen crumbles)
Frozen corn
Rotel (in a can)
2 medium potatoes, your choice
5-7 small corn tortillas
Enchilada sauce (we used green)
I made red beans from scratch but you don't have to. (However, I recommend it because it's easy, with no additives, no added salt!) Just cover beans with a few inches of water. Bring to boil. Keep on medium boil for 1-2.5 hours, depending on your elevation and how many you're cooking. Just check on the beans every 45 minutes - 1 hour. Taste a bean. Are they done? If not, just keep going. Add more water as needed. See how easy that is?
Now, here's where the preparation is needed. Just rinse and dice your potatoes. (Smaller pieces cook faster.) Now, bake at 375 or so, for 30 minutes. Turn your potatoes. I've also found that it helps to put water in the pan, or put a cup of water in the oven when baking. This will keep your potatoes moist. (This time I just filled the baking pan with water halfway up the potato pieces.) No, really. It works!
Cook your TVP or thawed boca burgers (that you've cut into small pieces) with taco seasoning. You can find a recipe to make your own online or use a premade package. (Just be careful because those are full of all kinds of preservatives and ingredients you can't pronounce!)
While that's all cooking, you'll want to slice up your tortillas. Open your rotel. Drain/rinse your beans. Get your corn out of the freezer or shave it right off the cob.
Can you see how easy this is?
The only thing you're waiting on is the potatoes. So, once they're mostly cooked just start layering:
Spread a thin layer of oil in your bowl to prevent sticking. Then go to town! We started with corn tortillas, then layered a bit of everything else. Don't forget to put a few spoonfuls of enchilada sauce in each layer. More corn tortillas, more layers. Then a top layer of tortillas again. Top off with a few spoonfuls of enchilada sauce again.
Preheat oven to 375.
Cover with foil and bake 20-30 minutes. With the glass container you can watch for the sauce inside to boil. When that happens, remove foil and bake until brown on top (another 20 or so minutes). Top with Daiya if you want - but it's not really necessary.
I thought there would be leftovers -- but trust me, there is no way you could leave this dish alone. We certainly didn't. So, go ahead and stuff yourself.. guilt-free.
YUM!
Fun with yogurt

I love yogurt. All the time. As a snack, as a meal, whatever.
Silk has many flavors of yummy yogurt. But my favorite thing is to make my own flavor combinations! I start with the plain but you can start with vanilla (because it's sweetened already.)
Try adding granola.
Add 100% fruit jam or jelly.
Use fresh fruit.
Add nuts, buckwheaties, cereal or anything crunchy.
Not sweet enough? Add a little raw sugar or agave.
Thursday, December 8, 2011
Personalized healthy granola
In an effort to curb my husband's snacking habits, I try to make sure he has a small container of healthy snacks to bring to work every day.
This one is actually great for dessert any day - and an in-between meals healthy snack. Plus, you get to use YOUR favorite ingredients. Anything goes. Trust me, you can't do it wrong.
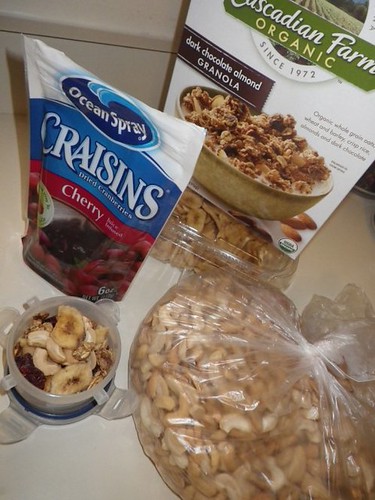
INGREDIENTS
Cascadian Farms organic chocolate granola
Fried organic banana chips (under the granola box, hard to see)
Dried fruit of any kind (I love raisins because they're 100% natural but Tyler won't eat them!)
Roasted, salted cashews (or almonds or peanuts or soynuts or whatever you have on hand)
*I even added roasted pumpkin seeds from our Halloween pumpkin carving experiment
See the small container? That's as much as he gets everyday. You can buy those almost anywhere now. Set your proportions and stick to them!
Even healthy food can pack on the pounds in excessive amounts. Small containers will keep your portion sizes down.
Chocolate + cherry cranberries + nuts or seeds = A tastegasm any time of day!
Enjoy!
This one is actually great for dessert any day - and an in-between meals healthy snack. Plus, you get to use YOUR favorite ingredients. Anything goes. Trust me, you can't do it wrong.
INGREDIENTS
Cascadian Farms organic chocolate granola
Fried organic banana chips (under the granola box, hard to see)
Dried fruit of any kind (I love raisins because they're 100% natural but Tyler won't eat them!)
Roasted, salted cashews (or almonds or peanuts or soynuts or whatever you have on hand)
*I even added roasted pumpkin seeds from our Halloween pumpkin carving experiment
See the small container? That's as much as he gets everyday. You can buy those almost anywhere now. Set your proportions and stick to them!
Even healthy food can pack on the pounds in excessive amounts. Small containers will keep your portion sizes down.
Chocolate + cherry cranberries + nuts or seeds = A tastegasm any time of day!
Enjoy!
Last-minute baked veggies
We wanted savory veggies with dinner but, as happens a lot lately, I didn't prepare anything in advance. So, what did I do?
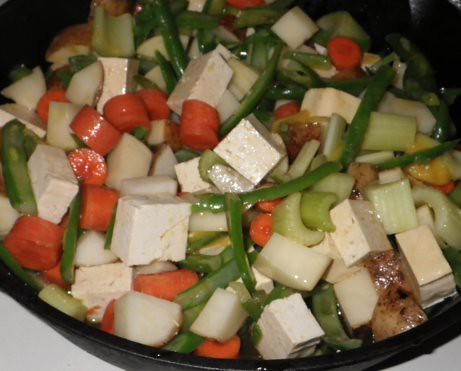
After checking the fridge, freezer and spice cabinet to see what we have.. here's what I came up with!
INGREDIENTS
1/2 block tofu, diced to preference (optional - can use seitan or leave out completely)
3 large stalks celery, diced
2 large carrots, diced
2 med-large potatoes, diced
1/2 c green beans (frozen)
OJ concentrate
Oil
Soy sauce
Desired spices
Basically I diced the easy-to-cook veggies larger (celery), and potatoes (since they take longer) smaller.
Toss with 1 T oil. Add 2 T frozen orange juice concentrate. Douse with soy sauce. Shake.
Now add spices: salt, pepper, paprika, garlic, thyme, basil, rosemary (ir desired).
Mix. Shake.
Put in your trusty cast iron skillet. To keep your veggies moist, add about 1/4 inch of water in the pan. Now cover with foil. Bake at 375 degrees, covered with foil, for about 1/2 hour. You can use this time to prepare a pilaf or bread or whatever you want to have with your veggies.
After 30 minutes or so, check your veggies. Pierce the harder-to-cook (potatoes or carrots) with a fork. Almost done? Now is when you remove the foil and bake again for 10-15 minutes to brown.
Check the veggies every 10-15 minutes. Turning each time. This will brown everybody and make them taste absolutely delicious:
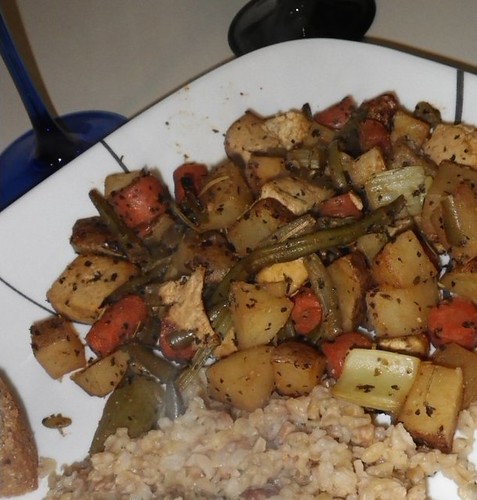
Does it get any easier?
After checking the fridge, freezer and spice cabinet to see what we have.. here's what I came up with!
INGREDIENTS
1/2 block tofu, diced to preference (optional - can use seitan or leave out completely)
3 large stalks celery, diced
2 large carrots, diced
2 med-large potatoes, diced
1/2 c green beans (frozen)
OJ concentrate
Oil
Soy sauce
Desired spices
Basically I diced the easy-to-cook veggies larger (celery), and potatoes (since they take longer) smaller.
Toss with 1 T oil. Add 2 T frozen orange juice concentrate. Douse with soy sauce. Shake.
Now add spices: salt, pepper, paprika, garlic, thyme, basil, rosemary (ir desired).
Mix. Shake.
Put in your trusty cast iron skillet. To keep your veggies moist, add about 1/4 inch of water in the pan. Now cover with foil. Bake at 375 degrees, covered with foil, for about 1/2 hour. You can use this time to prepare a pilaf or bread or whatever you want to have with your veggies.
After 30 minutes or so, check your veggies. Pierce the harder-to-cook (potatoes or carrots) with a fork. Almost done? Now is when you remove the foil and bake again for 10-15 minutes to brown.
Check the veggies every 10-15 minutes. Turning each time. This will brown everybody and make them taste absolutely delicious:
Does it get any easier?
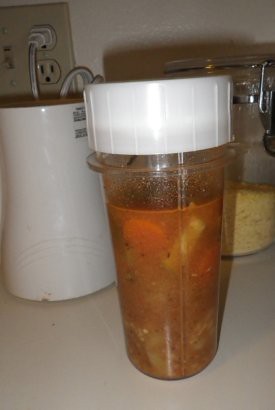
Drink THIS
Afraid of gaining weight this holiday because you're constantly drinking high-calorie (not to mention unhealthy high-sugar, -fat or -artificially flavored) drinks? Have no fear.. this beautiful drink will save the day - and your waistline.

Children and adults alike shouldn't be drinking straight juice, right? Even if it's 100% juice, it's still very high in calories and practically completely deficient in fiber.
What can you enjoy, guilt-free this holiday (and all year long)?
INGREDIENTS
A beautiful glass
100% juice (frozen or not)
Carbonated water (less than a buck for 2-liter bottle)
Presentation is part of enjoying your food. Use a beautiful glass. Try it!
If using 100% frozen juice concentrate, add 1 teaspoon-ish to the bottom of each glass. Let it melt.
If using juice, you can enjoy your drink almost immediately! Just put 1-3 teaspoons of juice concentrate in your glass and top off with cold carbonated water. Enjoy!
*Or start using 1/2 glass juice and 1/2 glass carbonated water if you're trying to wean yourself off of high-sugar drinks. You can gradually lower the amount of juice.
Wednesday, November 30, 2011
Spaghetti squash is surprisingly yummy
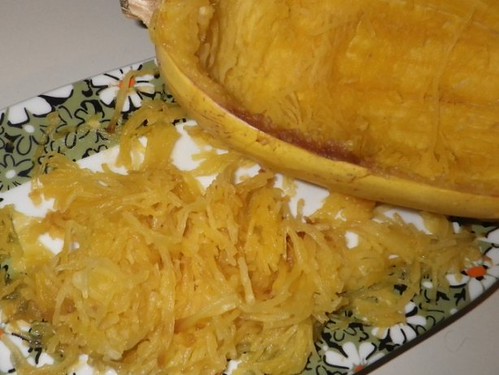
I can't believe that I don't eat spaghetti squash more often.
Did you know the paler spaghetti squash has something along the lines of 40 calories per half cup?! Amazing!
Preheat your oven to 350.
Slice spaghetti squash length-wise. Place face down in cast iron skillet or pan. I also put 1/2 inches of water in the pan with the squash, to keep it very moist.
Cook 30 minutes. This may or may not be enough (depending on how efficient your oven is.) So flip the squash and see if the meat is soft. If it is -- this is the fun part!
Using a fork, slide it inside the squash to remove the meat. It'll come out in strands.. just like spaghetti!
VARIATIONS
Top with Alfredo sauce (made from Chreese + mylk).
Top with salt and pepper.
I bet this would even be good with sugar on top as dessert!
You can't go wrong. Eat it. Enjoy!
Easy roasted veggies
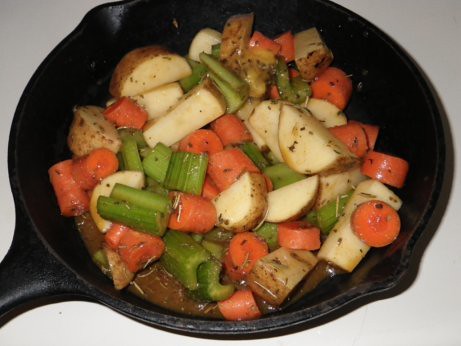
This is healthy, yummy, exquisite and beautiful when served!
Serves 2
INGREDIENTS
1 large potato
3 med/lg carrots
3 stalks lg celery
1-2 T olive oil
2 T soy sauce
2 T frozen oj concentrate (or use orange juice but you'll have to cook off the water)
Spices: garlic, paprika, thyme, parsley, rosemary, salt, pepper
Dice all veggies. Place in bowl with oil. Shake. Add soy sauce and oj. Mix. Shake. Mix.
Add spices. Use about 2 T of your favorites. Add 1 T of others. Don't be afraid to use extra spices.
NOTE: to speed cooking time, cut your carrots and potatoes smaller. Celery can be left larger. It's the potatoes and carrots that take the most time. So be prepared to cook them an hour if you leave your veggies large like I do.
Cook 350 degrees for 15 minutes. Stir. Cook another 15 minutes. Stir.
Turn up to 425 degrees for 15 minutes. Pierce veggies with fork. If they're not done to your liking, just stir and put back into oven.
This takes about an hour, so start the veggies first. Play some jazz and have some wine while you make the rest of dinner. Voila! The veggies will be ready just in time.
Friday, November 25, 2011
Thanksgiving feast
* * * No animals were harmed in making of this fantastic holiday feast * * *

Recipes to follow...
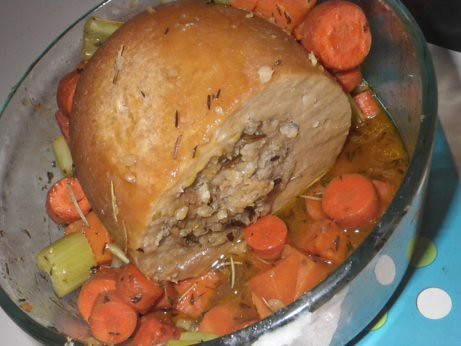
Enjoy savory Thanksgiving-y foods year-round! Why wait until a holiday?
Recipes to follow...
Enjoy savory Thanksgiving-y foods year-round! Why wait until a holiday?
Monday, November 21, 2011
Very vanilla dessert / breakfast / anytime cake
The best cake you will ever have. Srsly.
INGREDIENTS
1 1/2 c flour (I use whole wheat)
1/2 c raw sugar
1 t baking soda
1/2 t sea salt
1 container vanilla yogurt
1 T oil (I use almond oil)
1 c mylk (I use almond)
2 T vanilla
DIRECTIONS
Mix your dry ingredients. Now add wet ingredients. You want a very wet batter. Ta-da!
Pour into your new automatic, fun gadget. Press "bread" function.
Or, if you haven't purchased this awesome machine.. Bake at 350 degrees for about 30 minutes. The cake should remain moist.
Trust me.. even three days later, these leftovers are exquisite.
TOPPINGS
Thaw frozen strawberries. Add some corn start to the juice to thicken a little. Smother your cake.
Add a healthy chocolate syrup: Mix 3 T agave + 1-2 t almond oil + enough cocoa powder to make a syrup. Yes, it really is that easy!
You'll see in the photo, this time I just sprinkled with a little raw sugar for a crunch. WOW. Simple and wonderful.
QUESTIONS
WHY do I use the ingredients that I use?
*I like vanilla! Use more, not less.
*I only use whole wheat flour when I cook... but you could use whatever you have. Just remember, if your flours, sugars or any foods are unnaturally uniform -- you probably shouldn't be eating them. (That includes iodized salt, white sugar, white flour, etc..) There is no nutritional value in these "foods". They are remnants of an age in our history when these uniform foods were a status symbol. And we all know what diseases plagued the rich!.. obesity, diabetes, early death.. oh wait, is this ringing a bell?
*Almond oil is sweet (and I use it in my raw chocolate treats) but you can use whatever oil you want. Add more if you want, too. Remember, the yogurt has fat in it, that's why I lowered the amt of fat I added.
*Don't be afraid of whole sugars! I lowered the amt sugar because the yogurt is sweetened. But if you're making this for someone who likes traditional/processed/overly sweet sweets, then add more sugar like the original recipe calls for. Then, gradually reduce the amount.
Monday, November 14, 2011
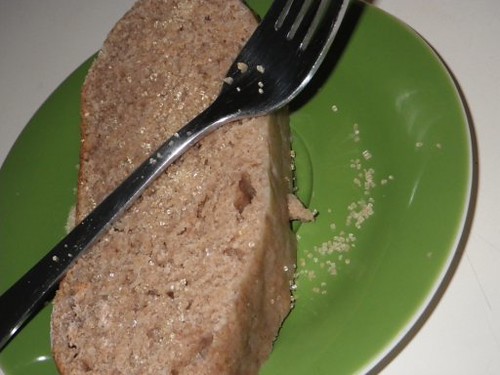
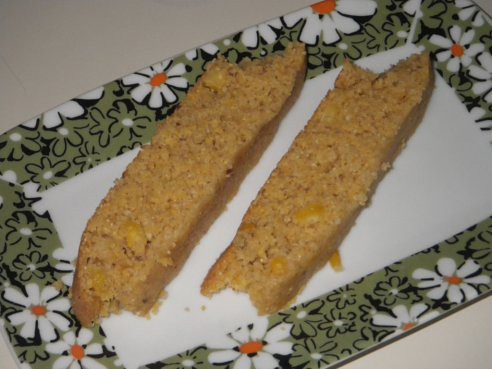
Sweet cornbread (made in my rice cooker)
If you love sweet cornbread (like my husband).. dig in! It's rich, corny and amazing.
Feel free to double, triple or quadruple this recipe. Make it into muffins, cakes or whatever shape you prefer.
INGREDIENTS
1/2 c corn meal
1/2 c whole wheat flour
1.5 t baking powder
1/2 t salt
Up to 1/3 c raw sugar
1/3 c corn (fresh or frozen)
1 t flax meal
3/4 - 1 1/4 c almond mylk (or your favorite) -- make a wet batter
SO EASY!
Mix the dry ingredients together. Add the wet ingredients. Then add corn. Mix well.
Pour into your new automatic, fun gadget. Press "bread" function.
Seriously... I don't think this could get any easier!
Saturday, November 12, 2011
Chocolate cake (made in my rice cooker)
> sorry no picture.. we ate it too fast! >
INGREDIENTS
1 c whole wheat flour
1/2 - 2/3 c sugar
3 T cocoa powder
2/3 t baking soda
1/3 t salt
2/3 c strong, strong, strong coffee (or water if you don't use coffee)
1/4 c oil
2/3 t vinegar
2 t vanilla (or more!)
Honestly, I don't think this cake could be easier to make.
DIRECTIONS
Mix dry ingredients in bowl
Then, add wet ingredients.
Stir until well mixed and all dissolved.
Pour into your new automatic, fun gadget. Press "bread" function.
Wait 80 minutes -- it will beep at you. Flip for the last 10 minutes of the cycle.
Tada!
Enjoy with a yummy, healthy peanut butter icing:
INGREDIENTS
1/2 c real peanut butter
1/4 c whole wheat flour
1/4 c maple syrup
INGREDIENTS
1 c whole wheat flour
1/2 - 2/3 c sugar
3 T cocoa powder
2/3 t baking soda
1/3 t salt
2/3 c strong, strong, strong coffee (or water if you don't use coffee)
1/4 c oil
2/3 t vinegar
2 t vanilla (or more!)
Honestly, I don't think this cake could be easier to make.
DIRECTIONS
Mix dry ingredients in bowl
Then, add wet ingredients.
Stir until well mixed and all dissolved.
Pour into your new automatic, fun gadget. Press "bread" function.
Wait 80 minutes -- it will beep at you. Flip for the last 10 minutes of the cycle.
Tada!
Enjoy with a yummy, healthy peanut butter icing:
INGREDIENTS
1/2 c real peanut butter
1/4 c whole wheat flour
1/4 c maple syrup
Thursday, November 10, 2011
Several stews (in my new rice maker)
Stew. Wow. Yum. The only thing better?.. having it with a a slice of homemade bread!
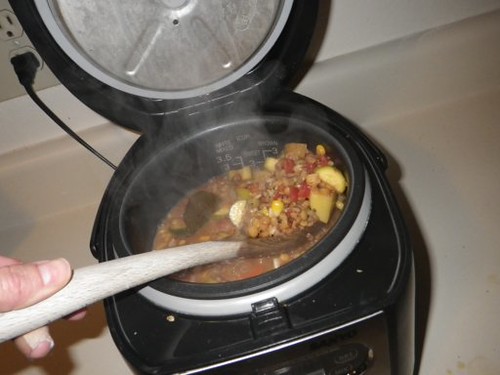
Do you know what is so fantastically wonderful about this little gadget?? Coming home to dinner! This is soooo easy. Unbelievably awesome. The apartment smells wonderful. Dinner is ready. Wow. How did I ever get along without this?
The only thing that limits this products usage is your imagination..
VERSION 1
2.5 c water
1/4 c brown rice (dry)
1/4 c lentils (dry)
1/4 - 1/2 c boca crumbles (or sub plain TVP + spices)
2 stalks celery, sliced
1/2 zucchini, sliced
1 carrot, sliced
medium potato, diced medium sized
1 bullion
2 heaping T nutritional yeast
1 t paprika, garlic, onion, chili powder, raw salt
VERSION 2
1/4 c lentils (dry)
1/4 c brown rice (dry)
1/4 c rotel (use as spicy as you want)
2-3 c water
Approximately 1/4 c: frozen corn, diced potato, peas, diced carrot
2 stalks celery, sliced
2 T bullion + garlic, paprika, onion, salt
VERSION 3
Try curry!
How easy is this? Put all of your ingredients in the cooker. Hit start. That's how easy. Or, alternatively you can throw this in before you leave the house and set the timer... then dinner is ready when you come home!
That's it!
OPTIONS
* Don't have a cooker? Just cook this right on your stove. I put the harder veggies in first... cook about 30-60 minutes, then add softer veggies. If adding pasta, add it with just enough time (according to the package) at the end.
* You can play around with the spices. You can open the lid, stir and smell it. That's how I always decide when/if to add more spices and what to add. * Don't be afraid! Trust that nose of yours.
First batch: homemade bread in my rice cooker
Wow. Yummy.
Smells great. Looks great. Tastes great!

INGREDIENTS
1 3/4 c wheat flour
1 c scalded almond mylk
1 T olive oil
2 T agave nectar
1 1/4 t active dry yeast
1/4 c millet seeds
1-2 T poppy seeds
up to 1 t salt
Instructions are fairly easy. While scalding your mylk. In a bigger bowl, mix the oil, agave and salt. Once mylk is scalded, pour into the bowl. Mix. Let sit until warm, not hot.
Once warm, add yeast. Mix. Let sit until dissolved.
Now, slowly add wheat flour and all seeds. Knead about 10 minutes. Put flour into bowl. Add your dough. Voila.
REMEMBER: this dough is very, very, very sticky. So you'll want to throw whole wheat flour on it and on your hands each time you knead the dough. It also gives it this pretty finished look.
Follow instructions of your new automatic, fun gadget: press "bread" function. Press "start". After 40 minutes you'll hear a beep. Press down dough and turn it over.
After another 40 minutes you'll hear another beep.
Flip dough. It'll have 10 more minutes to cook.
That's it! Now enjoy the smells, tastes and health of your healthy, homemade bread.
OPTIONAL:
Add 2 T - 1/4 c sunflower seeds, pumpkin seeds or even 1/2 c dried fruit!
Smells great. Looks great. Tastes great!
INGREDIENTS
1 3/4 c wheat flour
1 c scalded almond mylk
1 T olive oil
2 T agave nectar
1 1/4 t active dry yeast
1/4 c millet seeds
1-2 T poppy seeds
up to 1 t salt
Instructions are fairly easy. While scalding your mylk. In a bigger bowl, mix the oil, agave and salt. Once mylk is scalded, pour into the bowl. Mix. Let sit until warm, not hot.
Once warm, add yeast. Mix. Let sit until dissolved.
Now, slowly add wheat flour and all seeds. Knead about 10 minutes. Put flour into bowl. Add your dough. Voila.
REMEMBER: this dough is very, very, very sticky. So you'll want to throw whole wheat flour on it and on your hands each time you knead the dough. It also gives it this pretty finished look.
Follow instructions of your new automatic, fun gadget: press "bread" function. Press "start". After 40 minutes you'll hear a beep. Press down dough and turn it over.
After another 40 minutes you'll hear another beep.
Flip dough. It'll have 10 more minutes to cook.
That's it! Now enjoy the smells, tastes and health of your healthy, homemade bread.
OPTIONAL:
Add 2 T - 1/4 c sunflower seeds, pumpkin seeds or even 1/2 c dried fruit!
Everyone needs this automatic toy
What is it?

It's brilliant!.. that's what it is.
What does all of this mean?
Well, you can make bread in your rice cooker! In fact, you can set it to bake it before you wake up. Genius, right?
Want to lose some weight? You can set this magic machine to have low-fat, healthy, delicious breakfasts (of oatmeal, millet, rice or even a whole grain bread)... you can have it make rice and keep it warm until you're ready to eat.. you can set it to have dinner ready when you are!
Plus - and this can't be stressed enough - it's attractive enough to sit on your counter at all times AND it's tiny, tiny, tiny. Perfect!
I'm searching for recipes today and will, as always, tweak them to be healthy, delicious and creative before posting for you.
Where can you get one of your own? CLICK HERE!
It's brilliant!.. that's what it is.
Product Features
Color: Black
- Rice cooker/warmer with micro-computerized technology
- Bread-baking function; multi-menu selections for one-touch cooking
- Nonstick inner pot; pre-soak option; reheat function; keep warm
- LCD clock and timer; measuring cup, instructions, and recipes included
- Measures approximately 11 by 9 by 8 inches
What does all of this mean?
Well, you can make bread in your rice cooker! In fact, you can set it to bake it before you wake up. Genius, right?
Want to lose some weight? You can set this magic machine to have low-fat, healthy, delicious breakfasts (of oatmeal, millet, rice or even a whole grain bread)... you can have it make rice and keep it warm until you're ready to eat.. you can set it to have dinner ready when you are!
Plus - and this can't be stressed enough - it's attractive enough to sit on your counter at all times AND it's tiny, tiny, tiny. Perfect!
I'm searching for recipes today and will, as always, tweak them to be healthy, delicious and creative before posting for you.
Where can you get one of your own? CLICK HERE!
I hope you enjoy!
Wednesday, November 9, 2011
Shortcut pizza
In a hurry? You can still make a healthy pizza!

INGREDIENTS
Vegan naan
Organic pizza sauce
Artichokes, canned in water (super low-calorie!)
Kalamata olives
Diced tomatoes
Smidge of daiya cheese
Red pepper + Nutritional yeast == hot, cheesy sprinkle topping
Preheat oven to 425.
Using your vegan naan, layer sauce + tons of artichoke hearts + olives (kalamata are the best), tomatoes and anything else you can think of.
Now barely sprinkle your daiya cheese on top. Trust me, it doesn't take much to make this pizza scrumptious!
Cook < 20 minutes. It depends on your oven. But I find 425 makes the naan super crispy and melts the daiya.
Who says vegans can't be lazy? Enjoy!
Inside-out sushi
I can't believe I didn't try this sooner~ Inside-out sushi is soooooooo good (and easy, too.) Who would've thought?

Serves 2 hungry people.
INGREDIENTS
1 c dry short-grain brown rice (or sub sushi rice -- or even mix it half/half)
1/4 c rice vinegar + 1 1/2 T raw sugar + up to 1 t salt
Veggies of choice, cut into strips / julienned (carrots, bell peppers, celery, avocado, asparagus.. anything!)
Nori (raw or toasted)
You'll also need:
Wax paper
Sushi roller
Sharp knife
Step 1
DO THIS STEP AT LEAST A FEW HOURS EARLIER. You can even do this a day before. Cook 1 cup dry brown rice in 2.25 c water. Boil about 30-40 minutes. You want it to be overcooked a bit. This will make it stickier.
Now, mix your rice vinegar + sugar + salt. When rice is done, add your vinegar mixture. Stir. Squish this into a bowl, cover and put in the fridge for a few hours. Rice must be cold to use.
Step 2
When you're ready to make sushi... Lay out your wax paper. Put your sushi roller on top of the wax paper. Now, take out a piece of nori. Do you see those handy little lines in the paper? Snap that Nori in half using those lines.
Step 3
Lay your nori on the roller. You're going to cover the nori with your now-sticky brown rice mixture. Keep your hands wet (this helps the rice not stick to you.) Use enough rice (about a quarter of what you made) to cover the nori completely from edge to edge.
Step 4
Now you're going to pull your wax paper from underneath the sushi roller. Put it on top of the sushi you're making. Holding the sushi between the roller and wax paper, you're going to flip everything upside down. (So now it's wax paper underneath, sushi in middle and roller on top.
Simply put your roller under the wax paper now. Your sushi should be rice-side down and nori-side up.
Step 5
Fill with julienned veggies!
Step 6
Use your roller to evenly roll your sushi into a roll:

Squeeze as you roll the sushi. The wax paper will help you press the rice into the nori.
Step 7
Use your very sharp knife (keep it wet to prevent sticking) to slice the sushi.
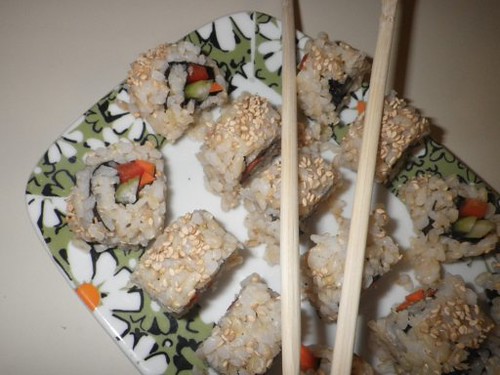
This will be the best sushi you've ever made. Promise.
YUM!
Serves 2 hungry people.
INGREDIENTS
1 c dry short-grain brown rice (or sub sushi rice -- or even mix it half/half)
1/4 c rice vinegar + 1 1/2 T raw sugar + up to 1 t salt
Veggies of choice, cut into strips / julienned (carrots, bell peppers, celery, avocado, asparagus.. anything!)
Nori (raw or toasted)
You'll also need:
Wax paper
Sushi roller
Sharp knife
Step 1
DO THIS STEP AT LEAST A FEW HOURS EARLIER. You can even do this a day before. Cook 1 cup dry brown rice in 2.25 c water. Boil about 30-40 minutes. You want it to be overcooked a bit. This will make it stickier.
Now, mix your rice vinegar + sugar + salt. When rice is done, add your vinegar mixture. Stir. Squish this into a bowl, cover and put in the fridge for a few hours. Rice must be cold to use.
Step 2
When you're ready to make sushi... Lay out your wax paper. Put your sushi roller on top of the wax paper. Now, take out a piece of nori. Do you see those handy little lines in the paper? Snap that Nori in half using those lines.
Step 3
Lay your nori on the roller. You're going to cover the nori with your now-sticky brown rice mixture. Keep your hands wet (this helps the rice not stick to you.) Use enough rice (about a quarter of what you made) to cover the nori completely from edge to edge.
Step 4
Now you're going to pull your wax paper from underneath the sushi roller. Put it on top of the sushi you're making. Holding the sushi between the roller and wax paper, you're going to flip everything upside down. (So now it's wax paper underneath, sushi in middle and roller on top.
Simply put your roller under the wax paper now. Your sushi should be rice-side down and nori-side up.
Step 5
Fill with julienned veggies!
Step 6
Use your roller to evenly roll your sushi into a roll:
Squeeze as you roll the sushi. The wax paper will help you press the rice into the nori.
Step 7
Use your very sharp knife (keep it wet to prevent sticking) to slice the sushi.
This will be the best sushi you've ever made. Promise.
YUM!
Tuesday, November 8, 2011
Delicious, healthy(ish) berry cake
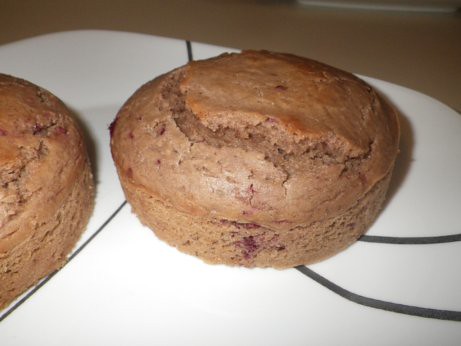
This recipe filled 2 small springform cake pans. I thought it would serve 4 (two people per springform pan) -- but honestly, after what I originally considered "1 serving" (half of one of the 4" springform pans), I nearly exploded. So, this could actually feed up to 8 people! (Silly me.. I thought I had shrunk the recipe to be a small amt.)
On to the fun stuff...
Preheat your oven to 375. Now get your ingredients ready.
INGREDIENTS
1 c whole wheat flour
1/2 c fresh or frozen berries (raspberry, blackberry or any berry you like!)
1 1/4 t baking powder
1/4 t salt
1 T ground flax
1/4 c oil
1/2 c raw sugar
1 1/2 t vanilla
3/4 c almond mylk (or your mylk of choice)
DIRECTIONS
Mix the flour, baking powder, salt and flax together. In a separate bowl, mix the oil, sugar, vanilla and mylk.
Now, add a little at a time and the liquid to the dry. Mix thoroughly as you go along. Mix, mix, mix.
You'll notice because you're using whole sugars that they are chunky in the batter. Don't worry. You're going to let it sit for 15 minutes before baking.
Now add your berries. Mix and let sit for 15 minutes.
Use a tiny amount of oil in your pans to prevent your cake from sticking.
Pour into the pans.
Cook almost 30 minutes. Watch it!
Voila. You'll have a rich, sweet, fruity, vanilla-y treat.
Need to serve 2-4 people and don't want leftovers? Just half the recipe.
Wednesday, November 2, 2011
Yummy, hearty, healthy corn pizza crust
INGREDIENTS
3/4 cup whole wheat four
3/4 cup corn meal
1 pkg. yeast
1 tablespoon olive oil
small pinch salt
1 teaspoon sugar
1/2 cup warm water
Start:
Mix warm water + sugar + yeast. Let sit 5 minutes.
Mix flour + cornmeal. Add water mixture. Add oil. Mix very well.
Wait:
Let sit covered in a warm place for 45 minutes.
Finish:
Preheat oven to 450.
Roll your crust out as thin as you can. Bake 15 minutes without toppings. Add toppings and broil about 5-8 minutes. WATCH so it doesn't burn! Yummy.
Roll your crust out as thin as you can. Bake 15 minutes without toppings. Add toppings and broil about 5-8 minutes. WATCH so it doesn't burn! Yummy.
Enjoy!
Monday, October 3, 2011
Vegan Beer Brats? Yes!
Not exactly a recipe.. good just the same!

We used Whole Foods premade pizza dough to make fresh, warm buns. WOW. Fresh bread makes the meal SO much better!
To cook the brats, don't bother reading the package. It's easy: heat the skillet with a little olive oil, add some beer. Put your brats on the cast iron skillet and place a lid or plate mostly over the top. You're cooking and steaming in one go!
Turn, cook. Turn, cook some more. You'll know when it's done.
We shaped the buns out of the pizza dough and cooked at 375-400 degrees while the brat was cooking.
If you want heavenly comfort food... this will hit the spot!
Serve with freshly cooked zucchini.
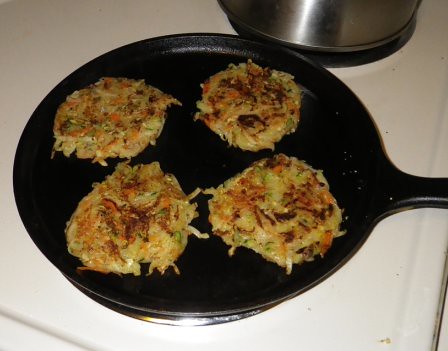
Better Than Hashbrowns
Who doesn't love hash browns on cold winter mornings? Well, it turns out hashbrown-y type foods are excellent for dinner as well.
It seems we're not the only one getting free, huge zucchinis. (No, that is not a euphemism.) So, what do you do with so much zucchini? Eat it, of course!
I decided I wanted a low-fat, hashbrown-y side dish with beer brats. Hashbrowns are a comfort food if you're from the south. We used to fry them, of course. But this low-fat way of cooking works out wonderfully. Truly.
INGREDIENTS
2 c grated zucchini
1.5 c grated potato
.5 c grated carrot
4 T whole wheat flour
1 T olive oil
Spices, optional
Use organic so you don't have to shave the skins before grating. Yum.
Grate the zucchini first. Put in a strainer and squeeze out as much water as possible. This will only take a few minutes.
Meanwhile grate your potato and carrot.
Mix together in a bowl. This is the pretty part!
Now add flour. Mix it up by hand. Add desired spices. I used about 2 t garlic, 1/2 t onion powder, 1 t raw salt.
Heat your cast iron skillet and heat up the oil. Form the grated veggies into patties. Cook about 5 minutes on each side. Use your food turner to press it down and flip a few times - but not too many. It'll hold together better if you don't flip too often.
These are fantastic! Oil it up if you want... but it's exquisite with only the oil on the skillet.
Thursday, September 29, 2011
Peanut Butter Cuplets
Very Reese's Peanut Buttercup-esque!

On the sweet side. With a little healthy fat. (Don't be afraid of a little fat!)
Serves 2
INGREDIENTS
3 dates
1 T fresh peanut butter (appoximately)
Chocolate syrup
Slice your dates into halves, then again. Lay on a plate. They should look like little triangular cups at this point.
Use the cup side of each date to scoop in a little peanut butter. (Or more if you like!)
Make your chocolate syrup and drizzle on top. (The recipe link sends you to a large batch of chocolate. You can make it and use it for a few days - or simply make a very small amount of the recipe. It's easy to make small batches at a time, trust me.)
Enjoy!
Variations: Try any nut butter you like. Almond, soy nut.. it doesn't matter. Every combination will taste a little differently.
Want a lower calorie, totally raw version? Try my very first recipe.
Creamy Soup Without Cream
No, really.
With the weather turning cooler, I have been craving soup. But even as wonderful as homemade soups taste... variety is still important. (Second only to fresh, fragrant spices!)
So, how do you make a creamy soup without cream? Easy!
Make your soup like you always do. Then, simply remove a few cups of soup and blend. Then pour back into your soup. It really is that easy.
Is there a veggie you want your family to eat but they won't? Blend that one! They won't even know it's there. Promise.
Wednesday, September 28, 2011
Sweet Seaweed Snack
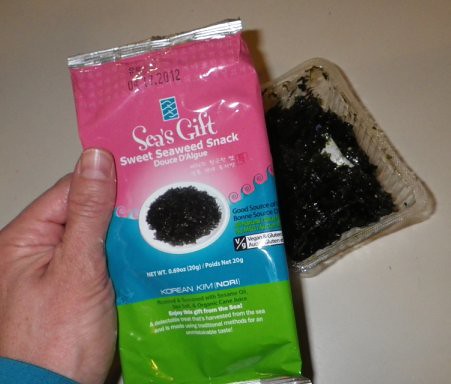
I don't know what I can say about this except... WOW!
Get some.
Get it now.
Enjoy.
Wow. I think this calls for some sweet nori recipes. Sound good?
Weekend Waffles
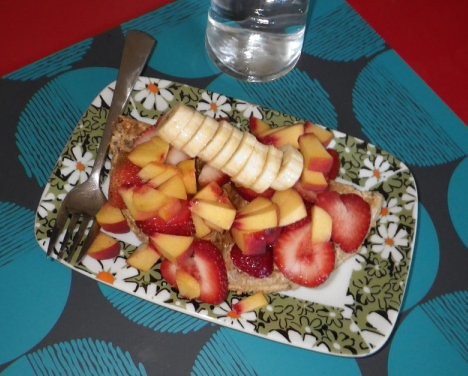
How do we celebrate saturdays and sundays? With waffles!
I know this waffle isn't written in my usual style but this is my husband's recipe. He is the waffle master. You want your batter to be pretty thick. So add liquid as necessary but don't make it too runny.
How to make it super yummy? For two waffles, cover them with a shared diced peach, several strawberries and half a large banana.
Don't forget: Use only 100% maple syrup.
INGREDIENTS
About 1 c oatmeal flour
1/2 c wheat flour
1 flax egg replacer
Vanilla, a little
Oil, a little (place a little in the waffle maker, too)
Proofed yeast in 1 tbsp sugary water (about 100 degrees)
Add 2 c almond milk
Use your waffle maker! This will make 2 waffles.
VERSION 2:
Replace oatmeal flour with regular flour.
Eat More Soup
Who loves soup? ME!

So, I am always throwing together tasty, spicy, herby yumminess. It's easy. Trust me.
Today's specialty:
About 8 cups of water (I filled my pot halfway to leave room for veggies)
1 russet potato, diced small, skin on
1 organic carrot, sliced, each piece cut in half
2 celery stalks, diced
1 large tomato, diced
Bean sprouts, placed in bottom of each person's bowl
Optional: 2 slices jalapeno (to kick it up a notch!)
Spices:
2 teaspoon veggie bouillon of your choice
1 heaping teaspoon each garlic, paprika, oregano, basil, onion powder.
1/2 teaspoon cayenne
OPTIONS:
Cube tofu and add about a half block
Sliced broccoli
Sliced cauliflower
Brown rice
Beans (black, red or any variety)
Don't be afraid to use what you have!
Step 1:
Boil water. Add potato + carrot. Boil for about 10 minutes. (These veggies need more time to cook.)
Step 2:
Now add tomato, celery (and any other veggie you'd like to add to your soup). Cook another 5 minutes. Now add all of your spices. Cook another 5-10 minutes. Fork your potatoes and carrots to make sure everything is cooked to your liking.
Add cooked rice and beans for 5 or more minutes at the end. They should already be cooked when you add them, so you're just re-heating them.
Step 3:
Put bean sprouts in bottom of bowls and spoon soup on top. Serve immediately. Yum!
Thursday, September 22, 2011
Sweet Potato Chili
Winter is almost here in Colorado... and the cool breezes make me crave hearty foods. Next week? Dosas! But for now, I decided to use my yummy sweet potatoes in a way that I don't usually: chili. That's right. Not a sweet chili, either. It's a hearty, healthy, yummy mouth-gasm. You'll adore this chili!

INGREDIENTS
1/2 c dried brown rice + 1 c water
1 medium sweet potato, peeled and diced small
1 can black beans, rinsed thoroughly
2 cups canned, diced tomatoes (I used fire-roasted by Muir Glen)
Approximately 4 T olive oil, depending on how heavy you'd like your chili
1 small onion or 1 t onion powder
3 cloves garlic or 1.5 t garlic powder
3 t ground cumin
1 t cayenne
1/2 t salt (I used pink Himalayan)
1.5 c water
Juice of one juicy lime
1 t flax (optional)
2 t dried cilantro or 2 T fresh cilantro
DIRECTIONS
Step 1: Brown rice to the rescue.
To begin, put 1/2 c dried brown rice and 1 c water in dried pot. Bring to boil. Then return to simmer. Keep the lid on until they're done.
Step 2: On to the chili.
Heat 3-4 T olive oil in your trusty cast iron skillet. (If you don't have one yet.. what are you waiting for?) Peel and dice your medium sweet potato. OPTIONAL: You can decide to add 1 small onion, diced small, right now. Or add onion powder later - it's your choice. Cook the potato (and onion, if used) about 5-6 minutes. They should start getting soft. Now, add 1.5 c water. Stir.
Step 3: Spice it up!
Add your spices. To counteract the sweetness of the potato, and depending how strong your spices are, you may want to add more (or less). I think the sweetest of the potato reacts well to all of the spices.
Stir in:
1 heaping t garlic powder or 4 cloves
2+ T chili powder (don't skimp!)
1 t dried onion (only if you didn't add onion in the beginning)
1 T ground cumin
1 heaping t paprika
1 t cayenne
1/2 - 1 t salt
1 T nutritional yeast (optional)
Cook about 10 minutes, or until potatoes are nearing the stage you want to eat them.
Step 4: Finish it up.
Now, add juice of one lime. Add your VERY RINSED can of black beans. Also, add your 2 c fire-roasted diced tomatoes.
Optionally: also add 1 t flax. It's healthy and you won't even know it's there.
Cook another 5 minutes. During this time, use your wooden spoon to stir and squish some of the beans, potatoes and tomatoes. This will thicken your chili. Stir, squish. Stir, squish. Do this for about 5 minutes.
Step 5: Don't forget your rice!
By this time your brown rice should be done. (Watch it!) Stir the hot rice into your chili. Reduce to simmer and keep warm until ready.
Voila. You'll love it. Serve with tortilla chips or a hearty toasted bread. Don't forget the fresh-squeezed limeade, too. (Mix juice of 1 - 1.5 lime per glass, add about 1 t agave. Mix well with cold water.
Yum! Now that's a meal.
Tuesday, September 20, 2011
Mini Sushirrito
Bigger than sushi, smaller than a sushirrito.... it's awesome!

I am a huge fan of seaweed. I could eat it everyday. I LOVE it. So, when I saw the new 'sushirrito' restaurants and recipes floating around, I had to try it.
Mine doesn't qualify for the enormity of a sushirrito -- but it was WAY too big to be called sushi, either. What was it? Filling. Tasty. Yummy.
INGREDIENTS
Brown rice, cooked and cooled
Apple cider vinegar
Veggies: celery, carrots, avocado
Meats: cooked tofu, veggie burger, anything really!
I used some stuff I had around the house for this recipe and it was amazing. So, you could probably change the ingredients completely and still come up with a great meal. NOTE: One Mini Susshrito is almost enough for two people!.. especially if you're having edamame or anything else with it. Trust me. Filling.
INSTRUCTIONS
Cook your brown rice. You want it moist and semi-soft. Now, let it cool until warm. Sprinkle with ACV and mix around. Put in the fridge. You want it cold. The ACV should make it more sticky, like sushi rice. NOTE: You must use short grain, not long grain.
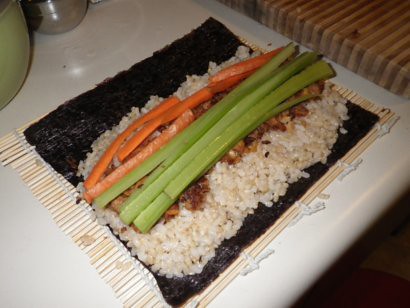
Lay out your nori on your sushi roller. Use a LOT of brown rice. This is your meal... so pile it on! Next, I layered the broken veggie burger all the way across. Now, add your sliced carrots, celery (yum!) and avocado if you have it. This is one large sushi.. so you must have a roller! (Stop by any local Asian market .. they're about a buck. No, srsly.)
Use a VERY sharp, wet knife to slice your sushi. Or, if you've made it big like a sushiritto, you can wrap it in wax paper or a cloth napkin and enjoy like a burrito! (See.. sushirrito.)
Dip in some soy sauce + hot sauce + mustard sauce. Enjoy!
I am a huge fan of seaweed. I could eat it everyday. I LOVE it. So, when I saw the new 'sushirrito' restaurants and recipes floating around, I had to try it.
Mine doesn't qualify for the enormity of a sushirrito -- but it was WAY too big to be called sushi, either. What was it? Filling. Tasty. Yummy.
INGREDIENTS
Brown rice, cooked and cooled
Apple cider vinegar
Veggies: celery, carrots, avocado
Meats: cooked tofu, veggie burger, anything really!
I used some stuff I had around the house for this recipe and it was amazing. So, you could probably change the ingredients completely and still come up with a great meal. NOTE: One Mini Susshrito is almost enough for two people!.. especially if you're having edamame or anything else with it. Trust me. Filling.
INSTRUCTIONS
Cook your brown rice. You want it moist and semi-soft. Now, let it cool until warm. Sprinkle with ACV and mix around. Put in the fridge. You want it cold. The ACV should make it more sticky, like sushi rice. NOTE: You must use short grain, not long grain.
Lay out your nori on your sushi roller. Use a LOT of brown rice. This is your meal... so pile it on! Next, I layered the broken veggie burger all the way across. Now, add your sliced carrots, celery (yum!) and avocado if you have it. This is one large sushi.. so you must have a roller! (Stop by any local Asian market .. they're about a buck. No, srsly.)
Use a VERY sharp, wet knife to slice your sushi. Or, if you've made it big like a sushiritto, you can wrap it in wax paper or a cloth napkin and enjoy like a burrito! (See.. sushirrito.)
Dip in some soy sauce + hot sauce + mustard sauce. Enjoy!
Soap nuts. No, really.
Not a recipe. Not something you can eat. But I thought it was important enough to post about.
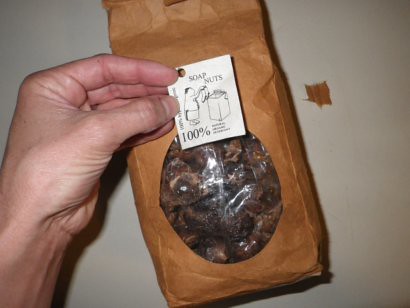
We bought these little beauties from 10,000 Villages. I'm sure you've seen one of these or shopped at one. Good for you! Their employees are all volunteers and the store is fair trade. That means your purchase truly supports a family or community, rather than lining the pockets of some corrupt corporation. Sounds good, right?
DIRECTIONS
Place 10 soap nuts in the included cloth pouch. Put in a cup. Pour hot water on top. Let it sit for 10 minutes while you separate your clothes and load the washer. (You must soak the nuts.)
Pour the water and pouch into the washer after about 10+ minutes. Wash as usual. See how easy that is? You can re-use this pouch and nuts for up to 5 loads.
NOTE: The instructions called for 5-6 nuts but honestly, that wasn't enough with this batch. Who knows.. maybe this batch of soap nuts were dried or just less productive. You'll figure it out with yours. Remember, these are natural products so there is no exact recipe.
Put your used soap nuts into a compost bin or throw them under a bush for all I care! They're natural. No waste. No garbage. You rock!
Pizza dough you don't have to make yourself
Whoever said you have to make all of your food from scratch.. never lived near a Whole Foods!
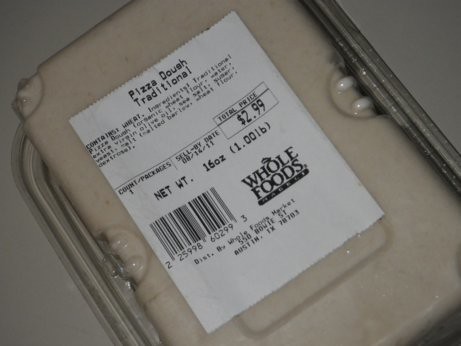
This $2.99 pre-made pizza dough can be found in the Whole Foods deli part of the store, near the other easy-to-grab and ready foods.
We discovered this little gem during one of our pizza-weeks. That's right, dang near entire weeks living on pizza. Can you blame us? The trick is to vary your toppings! And don't over-cheese it. That will wear you out and (dare I say) pack on the pounds!
So, with this $2.99 pack of pizza dough.. we make TWO dinners AND TWO lunches. Can you believe that?
Here's what you do:
Keep this dough in the fridge until about 6-10 hours before you're going to eat dinner. You'll want to put this on the counter (not in direct sunlight or anything). Just in a warm place where it can warm up and rise, rise, rise. Don't forget this step!
It will double, triple or even quadruple in size.. bursting out of its package.
Now, take your knife or scissors and cut it in half. Put half back into the fridge. It will be ready to use tomorrow or even the next day.
With the dough you have in your hands, press it out, flatten it out and put it into the shape you want and on your pizza pan.
Cook it for 400-500 degrees, about 5-10 minutes. I know this is vague but it will depend on the type of oven you use. Basically, you want it half-baked and becoming tan.
Remove from the oven and top with your favorite toppings!
My favorites:
Flavorful sauce
Artichoke hearts
Asparagus
Kalamata olives
Diced tomatoes
Seitan
A small amount of Daiya cheese. (I used to prefer Teese, until my local stores quit carrying it.) Daiya is definitely an acceptable option!
Bake on 400-broil, whatever you prefer. Bake the heck out of it. Seriously.
Remove when it's all toasty, bubbly and brown. This size pizza can be cut into 8 pieces. Have 2 each for dinner with a salad. Repeat with the remaining 2 pieces for lunch the next day. (Okay, when we lack fresh veggies for a side.. we've definitely indulged in the whole pizza for the meal.) Yum!
I blame my husband for my pizza addiction. It's definitely his fault. But honestly, I don't think he minds at all.
Wednesday, August 31, 2011
Fruit isn't just a snack anymore
Freshly cut cherries, sliced strawberries and ripe pears. Mmmm mmmm good! This is dinner, not breakfast.. twice this week, actually. I highly recommend it!

Sorry to sound like an after-school special.. but do you wonder why Americans are getting more unhealthy by the minute, fatter and what appears to be even more unhappy with each passing year?
Do you know anybody that walks instead of drives? When was the last time you saw someone snacking on fruit - instead of chips?
Did you know fruit is an amazing, healing food? NO, a processed "fruit" pie is NOT what I mean. An apple pie through a fast food restaurant drive-through is NOT like eating fruit. Supposedly-fruit flavored ice cream does NOT count, either. I guess the question is: do you eat fruit? Do you eat enough? Do you eat it raw?
If you answered 'No' or you're not sure, then you should pick up a copy or check out your library to find 'Eat to Live'. Dr. Fuhrman will explain in more eloquence why you should love, love, love fresh, raw fruit.
Eat it daily.
Eat is raw.
You'll be happy you did!
Best vegan biscuits and gravy in the whole, entire, huge world. Honest.
Flaky vegan biscuits? Is it possible?
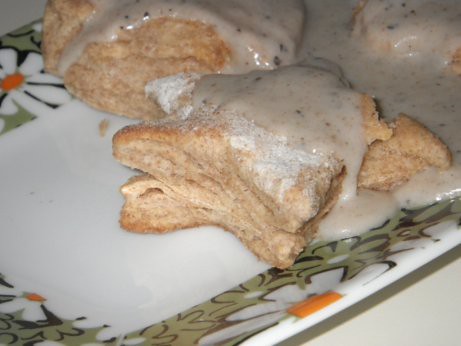
.... Yes!
Who loves biscuits and gravy? I DO! And once you have these, you'll never buy gross pre-made biscuits ever again.
INGREDIENTS
1 c almond milk
1 t apple cider vinegar
2 c whole wheat flour
1 t raw salt
2 1/2 t baking powder
3-5 T vegan margarine
* * *
STEP 1: Make your buttermilk.
1 c cold almond milk
1 t apple cider vinegar
Mix and set aside.
STEP 2: Mix your dry ingredients in a separate bowl.
STEP 3: Cut margarine into small bits and then add margarine to dry ingredients.
STEP 4: Now add your buttermilk to the dry ingredients. Mix well.
STEP 5: DO NOT SKIP THIS STEP. Form a ball of dough. This is what makes your biscuits flaky. Cover in an air-tight container and let sit in the fridge for at least one half hour. DO NOT SKIP THIS STEP.
When ready, preheat oven to 450 degrees.
Finally, roll and cut into desired shapes. Use cookie cutters. Apparently funny shapes make your biscuits taste better.
Cook for 12 minutes.
Enjoy ... everyday!
UPDATE: While visiting family last weekend we had to make these biscuits with white flour (yuck, right?) Well, the biscuits still turned out fluffy and flaky -- but they have less substance. So, if you must use white flour or half white flour, go ahead. But I recommend wheat. Your biscuits will be more satisfying. Promise.
_____
Option 2:
1/4 c water
Yeast
Dash of sugar
1 3/4 c flour
1/4 c wheat bran
2-5 t margarine
3/4 c almond mylk
Dash apple cider vinegar
Follow directions similarly as above. Proof the yeast with sugar and water. Let sit.
Mix mylk and vinegar and let sit to sour.
Mix flour, bran and margarine.
Now mix the yeast water with the mylk and add to the flour mixture. Mix, mash and let sit in fridge for 1/2 hour before cooking.
Easy!
** These are not as flaky as the biscuits above but still great.
Wednesday, August 24, 2011
A completely different veggie burger
Tired of the same old veggie burger? Tired of store-bought hard-as-rock burgers? Do you think they're your only option? Think again!
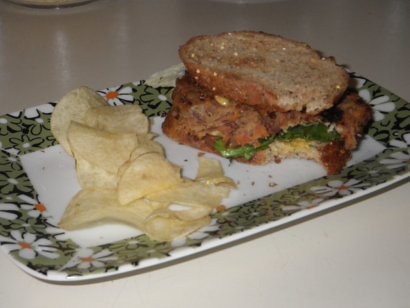
Veggie burgers are fast, easy and healthy.. plus, they rock. They freeze well. So, when you're cooking, feel free to make extra and freeze in an air-tight container. See, there's no excuse for not eating healthy!
* * *
This recipe makes 8 or so veggie patties. I doubled it and made 16. Yum!
INGREDIENTS
2 c cooked red beans
1 c grated carrots
1 cob corn, shaved
1/2 c wheat gluten
1/4 c flax seed (whole)
1/4 c nutritional yeast
1/2 c salsa
2 T soy sauce
2 T bullion
Plus: 1 t garlic
1 t onion powder
2 t rosemary, crushed between your fingers
Make sure your hands are clean because you are going to get messy!
NOTE: Making your own beans is soooooooo easy. Plus, have you ever tried to buy beans in a can without added salt? It's nearly impossible! And do you have any idea how much mark-up there is on pre-cooked beans? A bag of beans is about a buck. A can of beans is around two bucks. The trick is -- that bag will make several dozen, or more, cans of beans!
So... I usually make a batch of veggie burgers after I make a pot of beans. And here's how:
While beans are still warm from cooking, mix beans, carrots and corn in a bowl. (The warm beans are easier to mash.) Using your fist, grab and squeeze, and alternately crush with your fist, all ingredients until almost every bean is squished. Trust me, this is the best way to get your beans the perfect burger-consistency.
Now, add gluten, flax, salsa, soy sauce, nutritional yeast and then all remaining ingredients.
Continue grabbing, squeezing and squishing your burger mixture. You'll notice the gluten start to grab things and try to stick together. This is good!
Let your bowl of goodness sit for a while -- 5 or 10 or even 15 minutes. This will give the flax a chance to become gooey. It will also help hold your burgers together once cooked.
Form patties of desired size. Cook in a small amount of olive or veggie oil. Ta-da!
** Don't be afraid to add your healthy fats. I didn't add any fat into the burger because I cook in it. Your body NEEDS some fat. Luckily, veggie food is so healthy that it's okay -- and necessary -- to add healthy fats to it. **
Thursday, August 11, 2011
Everything Homemade BBQ
So, my first new recipe in Colorado - BBQ!
(Sorry for the bad photo.. my new camera hasn't arrived yet.)
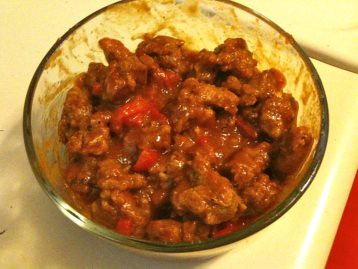
It's BBQ season, isn't it? Well, this vegan version is not only knock-your-socks-off great, but the sauce is unexpected and amazing. Tired of that same old BBQ sauce in a jar? Have no fear.. Bicyclingvegan to the rescue! Yes, I think that'll be my super hero name.
On to the goodies..
BBQ Ingredients
1 c wheat gluten
1/4 c nutritional yeast
1 1/2 T garlic powder
1/2 - 1 t onion powder
1 T paprika
2 T bouillon powder
1 c water
3 T oil or melted margarine
2-3 T nut butter of your choice
Making seitan is easier than you think. And cheaper, too!
Preheat oven to 375. Mix all dry ingredients together in a bowl. Now add oil and water. Mix well and quickly! It'll stick together well -- this is what wheat gluten does. That's why you always add any wet ingredients last.
Put your blob of gluten onto your cutting board. Smear with nut butter of your choice -- tahini, or peanut butter or almond butter or whatever you like. Different nut butters have different flavors. You choose.
I ripped it into bite-sized pieces. You can slice it if you prefer slices. Oil your pan a little. Place seitan bits or slices apart on the glass bowl or cooking sheet or whatever you're using. Bake 10 minutes. Now flip. Bake another 10 minutes. It should be pretty crispy and thoroughly cooked.
*** Keep in mind that this is just ONE way of many that you can make seitan. Sometimes you boil it before baking or frying. You can batter it and make a fried chik'n (that's quite good!) You can add tofu with the water (at the wet stage) for a thicker, more chicken fried steak-feel. It's heavier.. so it may be good to try that for your meat-eating friends. Don't be afraid to experiment. I promise, you won't hurt it! And you don't have to worry about undercooking your vegan seitan -- because you won't get any of those nasty things that meat-eaters get from undercooked or diseased meat. Yet another perk of veganism!
While your seitan is cooking, start your sauce. After adding the completed sauce to your BBQ, you can bake another 5-10 minutes to give your BBQ a caramelized texture.. beware not to overcook!
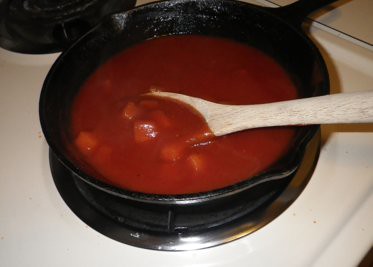
VERSION 1
Sauce Ingredients
step 1:
1/2 cup minced red (or whatever you have) bell pepper
2 T margarine
step 2:
1 cup water
1 c ketchup
1/2 - 1 t onion powder
1 t salt
1/2 - 1 t pepper
2 T vegan worcestershire sauce
2 - 4 T raw sugar
1 t yellow mustard powder
1 squeeze lemon or lime (optional)
VERSION 2
Sauce Ingredients
step 1:
1/2 - 1 c pineapple
2 T margarine
step 2:
2/3 cup water
1/3 c pineapple juice
1 c ketchup
1/2 - 1 t onion powder
1 t salt
1/2 - 1 t pepper
2 T vegan worcestershire sauce
1 T raw sugar
While your seitan is cooking, perform step 1 of your sauce by sauteing either bell pepper or pineapple. Once bell pepper or pineapple is cooked to your liking (about 5-15 minutes), add all ingredients in step 2. Keep on medium heat and cook until slightly thickened, about 15-20 minutes. (If necessary, add 1 1/2 t cornstarch pre-mixed with 1 T water. This will thicken sauce. But I didn't find it necessary.)
* * *
Now, once you've removed your cooked seitan from the oven, place in a glass bowl and smother in your awesome, tangy BBQ sauce. Remember, you can now cook your seitan another 5-10 minutes to caramelize the outside -- but trust me, it's not necessary!
Reheat it by baking 5-10 minutes.
Enjoy as a side-dish, on a sandwich or however you prefer. Just enjoy!
(Sorry for the bad photo.. my new camera hasn't arrived yet.)
It's BBQ season, isn't it? Well, this vegan version is not only knock-your-socks-off great, but the sauce is unexpected and amazing. Tired of that same old BBQ sauce in a jar? Have no fear.. Bicyclingvegan to the rescue! Yes, I think that'll be my super hero name.
On to the goodies..
BBQ Ingredients
1 c wheat gluten
1/4 c nutritional yeast
1 1/2 T garlic powder
1/2 - 1 t onion powder
1 T paprika
2 T bouillon powder
1 c water
3 T oil or melted margarine
2-3 T nut butter of your choice
Making seitan is easier than you think. And cheaper, too!
Preheat oven to 375. Mix all dry ingredients together in a bowl. Now add oil and water. Mix well and quickly! It'll stick together well -- this is what wheat gluten does. That's why you always add any wet ingredients last.
Put your blob of gluten onto your cutting board. Smear with nut butter of your choice -- tahini, or peanut butter or almond butter or whatever you like. Different nut butters have different flavors. You choose.
I ripped it into bite-sized pieces. You can slice it if you prefer slices. Oil your pan a little. Place seitan bits or slices apart on the glass bowl or cooking sheet or whatever you're using. Bake 10 minutes. Now flip. Bake another 10 minutes. It should be pretty crispy and thoroughly cooked.
*** Keep in mind that this is just ONE way of many that you can make seitan. Sometimes you boil it before baking or frying. You can batter it and make a fried chik'n (that's quite good!) You can add tofu with the water (at the wet stage) for a thicker, more chicken fried steak-feel. It's heavier.. so it may be good to try that for your meat-eating friends. Don't be afraid to experiment. I promise, you won't hurt it! And you don't have to worry about undercooking your vegan seitan -- because you won't get any of those nasty things that meat-eaters get from undercooked or diseased meat. Yet another perk of veganism!
While your seitan is cooking, start your sauce. After adding the completed sauce to your BBQ, you can bake another 5-10 minutes to give your BBQ a caramelized texture.. beware not to overcook!
VERSION 1
Sauce Ingredients
step 1:
1/2 cup minced red (or whatever you have) bell pepper
2 T margarine
step 2:
1 cup water
1 c ketchup
1/2 - 1 t onion powder
1 t salt
1/2 - 1 t pepper
2 T vegan worcestershire sauce
2 - 4 T raw sugar
1 t yellow mustard powder
1 squeeze lemon or lime (optional)
VERSION 2
Sauce Ingredients
step 1:
1/2 - 1 c pineapple
2 T margarine
step 2:
2/3 cup water
1/3 c pineapple juice
1 c ketchup
1/2 - 1 t onion powder
1 t salt
1/2 - 1 t pepper
2 T vegan worcestershire sauce
1 T raw sugar
While your seitan is cooking, perform step 1 of your sauce by sauteing either bell pepper or pineapple. Once bell pepper or pineapple is cooked to your liking (about 5-15 minutes), add all ingredients in step 2. Keep on medium heat and cook until slightly thickened, about 15-20 minutes. (If necessary, add 1 1/2 t cornstarch pre-mixed with 1 T water. This will thicken sauce. But I didn't find it necessary.)
* * *
Now, once you've removed your cooked seitan from the oven, place in a glass bowl and smother in your awesome, tangy BBQ sauce. Remember, you can now cook your seitan another 5-10 minutes to caramelize the outside -- but trust me, it's not necessary!
Reheat it by baking 5-10 minutes.
Enjoy as a side-dish, on a sandwich or however you prefer. Just enjoy!
Tuesday, July 19, 2011
We're moving!
Sorry it has been so long since I've posted anything new...
Don't worry, I haven't forgotten about you. We're moving all the way to Fort Collins, Colorado this week and I'll get back in the kitchen.
I promise.
Just for you guys!
Don't worry, I haven't forgotten about you. We're moving all the way to Fort Collins, Colorado this week and I'll get back in the kitchen.
I promise.
Just for you guys!
Monday, April 25, 2011
Homemade fruity granola
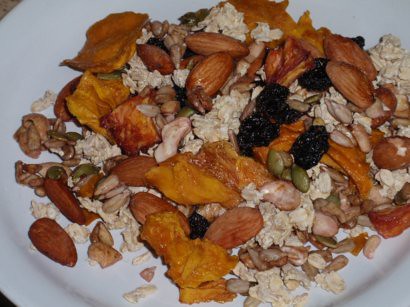
A few notes on making your own granola:
*Use whatever fruit you have on hand
*As you dice, keep fruit juice in bowl. You'll add all fruits and nuts to the juice to soak before dehydrating
INGREDIENTS
Dice 1 pineapple
Dice 6-10 champagne mangos
1 bag frozen cherries
Raw almonds, cashews, pumpkin seeds, sunflower seeds
Oat bits (see below)
Optional: Hemp, chia and flax seeds, buckwheaties
PINEAPPLE AND CHERRIES
Let pineapple and thawed cherries soak in the pineapple juice a few hours or overnight. *If someone has a reaction to nuts, like almonds.. try soaking them in water overnight, then rinsing. Add to recipe as usual (while wet is fine). This should reduce or eliminate most mild reactions to nuts. It worked for my husband! He always got an itchy/fuzzy tongue after eating nuts.. so I soak and dehydrate all of our raw nuts before eating or using in a recipe.
Now, put pineapple and cherries on dehydrator tray. Your pineapple bits will be a beautiful red-tipped color by now, too. It's gorgeous!
NUTS AND SEEDS
Now, add all nuts and seeds to remaining juice in the bowl. Let them soak for at least a few hours. Once they're saturated, put on dehydrator sheet and douse with sea salt.
MANGOES
Slice and get all mango pulp out of mangoes. Yes, it's a grueling process - but soooo worth it. Mangoes are one of the best fruits in the world. I just spread out the juicy pulp on dehydrator sheets. Some thinner spots, some thicker spots. I didn't cut anything, just spread it around.
OATS
For the oats, I just wet the remaining oatmeal oats (not raw, but pressed) with enough water to be sticky. Then, added about 1 T agave nectar and sea salt. Make little bunches of oats and press them out on the dehydrator tray. No need to be perfect. This can be messy. Then you'll get different sizes of oat bits.
Dehydrate everything at around 110 until dry.
Once done, store in an air-tight container in the fridge.
OPTIONAL
You can also add chia, buckwheaties, hemp and flax seeds for extra nutrition and crunch! Sprinkle it on. I promise, you can't mess it up.
All raw. All fresh. Filling and yummy!
Easy raw oatmeal breakfast or snack cookies
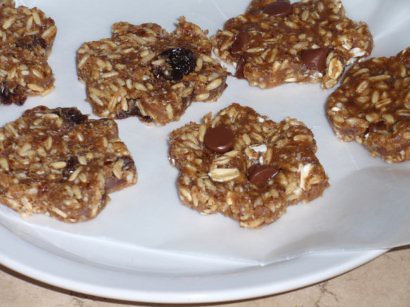
Raw cookies are absolutely amazing. They're easy to make, ready in just a minute. Though you can dehydrate for a few hours to thicken them up or melt your (not raw) chocolate chips.
Store in the fridge in a sealed container. Yummy! Cookies for breakfast? Yes, please!
INGREDIENTS
VERSION 1:
1 c raw oats, broken apart in your food processor/blender
3/4 c dates
1/4 c raisins
cinnamon
VERSION 2:
1 c raw oats, broken apart in your food processor/blender
1 c dates
1/4 c chocolate chips
cinnamon
Either way you go, these are easy. Unfortunately, my food processor blades are clearly dull. I had no idea until I tried to crack my raw oats! They just stirred them around.
Don't worry, raw oats are quite tasty and easy to chew. Yum.
Blend dates and oats well.
Add cinnamon and raisins or cinnamon and chocolate chips - by hand.
Squish, squish. Roll, roll.
NOTE: They're easy to make if you use wax paper. These are very, very sticky so the wax paper helps keep it under control. I did have to wash my cookie cutter halfway through to remove the stickiness. Also, I added a handful of regular oats (like you'd buy for oatmeal) to the last half of the chocolate chip cookie batch. They were just so sticky that I couldn't roll out the dough! I mixed in the oats and used them to keep everything from sticking.
Use your favorite cookie cutter. Put on dehydrator sheet, if you want to squish your chocolate cookies. It makes them melty and you can serve them warm out of the dehydrator. Yummy!
Store in the fridge in a sealed container.
Saturday, April 23, 2011
Raw Nestle Crunch
There is nothing simpler than making homemade nestle crunch-like candy bars.
Absolutely nothing!
INGREDIENTS
(Please note, these are approximations. Don't stress over a little change!)
1 c melted cacao butter
1/2 c ground cocoa powder
2 T maca powder
3 T mesquite powder
2-3 T agave nectar
Crunchies: Buckwheaties, raw nuts, raw fruit bits.. be creative!
Melt cacao butter. Once COMPLETELY melted, add cocoa, maca, mesquite and agave. Mix well. To keep it raw, melt easily in hot/warm water double-boiler. I put a mug in my hot water. Keep it very low heat and stir until completely melted.
Yes, it's messy.
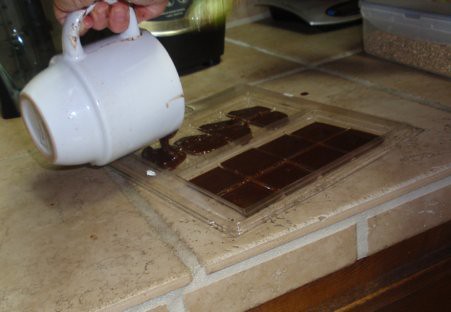
Love chocolate? Invest in a $2 chocolate mold from Hobby Lobby, like this one. It has square shapes that'll make it much easier to break off one serving at a time.
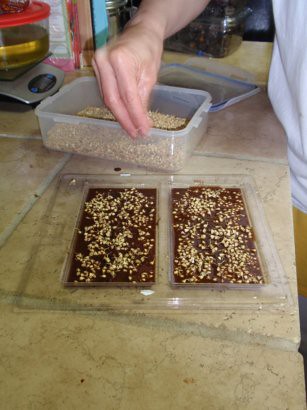
Once you've poured your chocolate.. use buckwheaties, nut bits or even fruit bits.. whatever you prefer!
** This amount of chocolate will fill several chocolate molds. So, quarter the recipe if you want to try just a little. **
Absolutely nothing!
INGREDIENTS
(Please note, these are approximations. Don't stress over a little change!)
1 c melted cacao butter
1/2 c ground cocoa powder
2 T maca powder
3 T mesquite powder
2-3 T agave nectar
Crunchies: Buckwheaties, raw nuts, raw fruit bits.. be creative!
Melt cacao butter. Once COMPLETELY melted, add cocoa, maca, mesquite and agave. Mix well. To keep it raw, melt easily in hot/warm water double-boiler. I put a mug in my hot water. Keep it very low heat and stir until completely melted.
Yes, it's messy.
Love chocolate? Invest in a $2 chocolate mold from Hobby Lobby, like this one. It has square shapes that'll make it much easier to break off one serving at a time.
Once you've poured your chocolate.. use buckwheaties, nut bits or even fruit bits.. whatever you prefer!
** This amount of chocolate will fill several chocolate molds. So, quarter the recipe if you want to try just a little. **
Friday, April 22, 2011
Raw Ice-Cream Snickers
A perfect treat for summer!
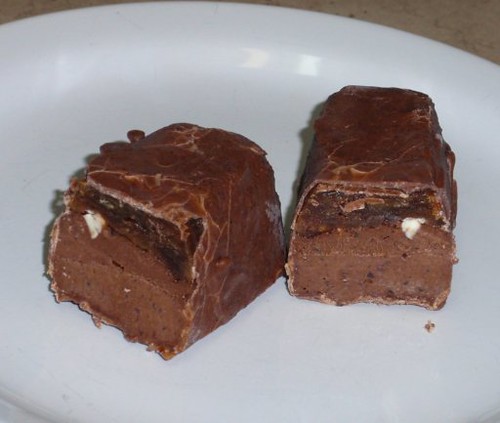
Who doesn't love a frozen candy bar? Like you, we do love to indulge in half a candy bar for dessert more often than we should.. so, I thought I'd try to make a better version using whole sugars. Our premade candy bar of choice? Jokerz, of course! Check out Go Max Foods. You can't go wrong. We split in half for a decadent, easy dessert.
But if you want a healthier candy-like bar that you can share with your kids (including making them).. try this on for size.
Go ahead, lick the spoon! That is, if you can get it away from your kids. Good luck!
INGREDIENTS (to fill entire pan)
About 25 dates
About 3/4-1 c diced walnuts
4 ripe, large avocados
3/4 c agave nectar
3/4 - 1 c cocoa powder
DIRECTIONS
Remove pits and blend dates in a food processor or by hand. I used medjool, so they're easily squished by hand if you want. Squish dates into candy bar molds, so you have an even distribution. (Next time I might add a few more dates. The caramel layer is fantastic!)
Now, sprinkled chopped nuts. I prefer raw pecans. Healthy and delicious!
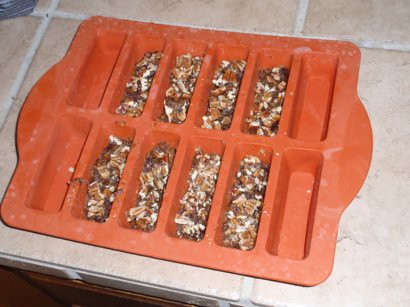
Blend avocado, agave and cocoa in food processor or blender. This is your ice cream. Go ahead, lick the spoon!
Pour ice cream over dates/nuts. Fill each container if you want.
Now, freeze for at least 8 hours. This will make your candy bars sturdy enough to work with so you can coat with a hard layer of chocolate.
When you're ready to coat your candy bars, you'll need to melt your chocolate coating.
NOTE: You don't * have * to do this last layer. However, it'll give your candy bars a coating. Otherwise it's super melty. That would still be fun, though. And they taste great either way. (You know we sampled between layers, so I can promise you that it's still tasty.)
To add the outer, crunchy layer:
INGREDIENTS
1 c melted cacao butter
1/2 c cocoa powder
2 T maca powder
3 T mesquite powder
2-3 T agave nectar
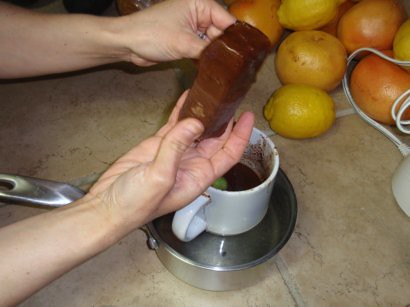
Melt the cacao butter by breaking it into fairly small pieces and putting that mug into some semi-hot water. Have your other ingredients ready - cocoa, maca, mesquite and agave.
Once the cacao butter is melted, simply add the remaining ingredients and mix well.
You'll need to remove the candy bars from the freezer - ONLY when you're ready to dip them.
Dip half of each one, put back on wax paper and refreeze a few minutes before dipping the other side of the bar. Dip twice for a thicker coating.
The result?
Soft, squishy ice cream on the inside.. and nuts and caramel, like a frozen snickers.. and a crunchy, thin chocolate coating on the outside.
Store in freezer, wrapped individually but in a sealed container. We find they're best shared.. and they slice easily. Yummy. They're rich, so sharing is easy!
Indulge without guilt!
Who doesn't love a frozen candy bar? Like you, we do love to indulge in half a candy bar for dessert more often than we should.. so, I thought I'd try to make a better version using whole sugars. Our premade candy bar of choice? Jokerz, of course! Check out Go Max Foods. You can't go wrong. We split in half for a decadent, easy dessert.
But if you want a healthier candy-like bar that you can share with your kids (including making them).. try this on for size.
Go ahead, lick the spoon! That is, if you can get it away from your kids. Good luck!
INGREDIENTS (to fill entire pan)
About 25 dates
About 3/4-1 c diced walnuts
4 ripe, large avocados
3/4 c agave nectar
3/4 - 1 c cocoa powder
DIRECTIONS
Remove pits and blend dates in a food processor or by hand. I used medjool, so they're easily squished by hand if you want. Squish dates into candy bar molds, so you have an even distribution. (Next time I might add a few more dates. The caramel layer is fantastic!)
Now, sprinkled chopped nuts. I prefer raw pecans. Healthy and delicious!
Blend avocado, agave and cocoa in food processor or blender. This is your ice cream. Go ahead, lick the spoon!
Pour ice cream over dates/nuts. Fill each container if you want.
Now, freeze for at least 8 hours. This will make your candy bars sturdy enough to work with so you can coat with a hard layer of chocolate.
When you're ready to coat your candy bars, you'll need to melt your chocolate coating.
NOTE: You don't * have * to do this last layer. However, it'll give your candy bars a coating. Otherwise it's super melty. That would still be fun, though. And they taste great either way. (You know we sampled between layers, so I can promise you that it's still tasty.)
To add the outer, crunchy layer:
INGREDIENTS
1 c melted cacao butter
1/2 c cocoa powder
2 T maca powder
3 T mesquite powder
2-3 T agave nectar
Melt the cacao butter by breaking it into fairly small pieces and putting that mug into some semi-hot water. Have your other ingredients ready - cocoa, maca, mesquite and agave.
Once the cacao butter is melted, simply add the remaining ingredients and mix well.
You'll need to remove the candy bars from the freezer - ONLY when you're ready to dip them.
Dip half of each one, put back on wax paper and refreeze a few minutes before dipping the other side of the bar. Dip twice for a thicker coating.
The result?
Soft, squishy ice cream on the inside.. and nuts and caramel, like a frozen snickers.. and a crunchy, thin chocolate coating on the outside.
Store in freezer, wrapped individually but in a sealed container. We find they're best shared.. and they slice easily. Yummy. They're rich, so sharing is easy!
Indulge without guilt!
Sugar-free (but sweet) Oatmeal
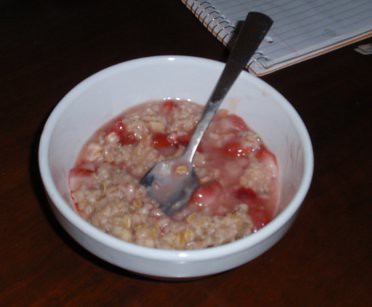
I'm a huge fan of warm breakfasts, even in summer. I love millet. I love oatmeal - no matter what kind. Change the fruits, add cinnamon, there is endless variety!
Serves 1
INGREDIENTS
1/2 c oats (not quick)
1 c water
1 date, diced small
3/4 c diced strawberries (or fruit of your choice)
You can easily double or triple this recipe for more people. Don't worry, you really can't do it wrong!
Mix oats and water on stove. Start bringing to boil.
Add diced date. Mix well.
Add fresh fruit! NOTE: If using frozen fruit, you must thaw first. So, you can heat that up in the pot before adding oats and water to it. That works fine.
Enjoy!
Monday, April 18, 2011
Oh, Vegan S'mores .. how I love you
Thanks to Chicago Soydairy, we had a wonderful, yummy, scrumptious, sugar-rific camping trip this weekend!

You, too, can enjoy skin-less, animal-less, tasty vegan marshmallows! It's easy. If we can find them in Northwest Arkansas.. so can you!
INGREDIENTS
Cruelty-free, awesome Chicago Soydairy Dandies marshmallows
Graham cracker of your choice
Dark chocolate
You know the drill...

I think you can safely call that a cajun-style marshmallow, don't you?
NOTE
We actually put our grahams, each with a square of chocolate, into our cast iron skillet. We placed that on the fire for a minute or two to soften the chocolate. It warms the grahams and melts the chocolate. YUMMY!
You, too, can enjoy skin-less, animal-less, tasty vegan marshmallows! It's easy. If we can find them in Northwest Arkansas.. so can you!
INGREDIENTS
Cruelty-free, awesome Chicago Soydairy Dandies marshmallows
Graham cracker of your choice
Dark chocolate
You know the drill...
I think you can safely call that a cajun-style marshmallow, don't you?
NOTE
We actually put our grahams, each with a square of chocolate, into our cast iron skillet. We placed that on the fire for a minute or two to soften the chocolate. It warms the grahams and melts the chocolate. YUMMY!
Low-fat super hot super wings
It's true, my husband will fry everything we eat if I let him. Do you have the same problem at your house? Well.. when he's at work, I try to experiment and make lower-fat versions of the foods he makes for us. Sometimes it works, sometimes it doesn't.
This time it did!
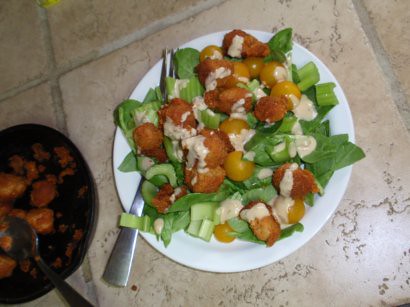
Don't worry, you can still get the fulll-fat, full-fried version here.
INGREDIENTS
Hot sauce
Soy sauce
Olive oil
Corn meal
TVP chunks
To start:
Preheat oven to 400 degrees.
Put your TVP chunks in warm/hot water to soak. They'll be ready in a mere 10 or so minutes. Heat it up to cook faster, if you want.
Meanwhile.. in two small bowls: put 1/4 c corn meal in one, mix 4:1:1 hot sauce, soy sauce and olive oil in the other.
Using one TVP chunk at a time, squeeze out water, dip into cornmeal, then hot sauce mixture, then corn meal again and hot sauce mixture one last time. Place these in your cast iron skillet. Repeat until you've covered each of your chunks.
Cook at 400 for about 10-15 minutes. Turn them once or so, to help them stick less to the skillet. Now, broil for 5-10 minutes, until brown and crispy! This part is crucial if you want get the same satisfaction you get from fried versions. Fried = crispy. So, broil until crispy. It's well worth the extra 5 minutes.
Serve on a bed of spinach or your favorite greens. Celery goes GREAT with hot foods. Have it in a salad with goddess dressing.. or dip directly into vegan sour cream. Your choice. It's great no matter how you eat it.
VARIATIONS
I added some water to the hot sauce mixture to lessen the heat. And it's still fantastic! You can even glob the remaining cornmeal/hot sauce mixture on top of the chunks once you've put them in the skillet. Just remember you'll have to cook them a little longer.
GOT PROTEIN?
Even though we don't care about protein (as you can and do get it anywhere and everywhere), learn more about the low-cal, high-protein content of TVP here.
This time it did!
Don't worry, you can still get the fulll-fat, full-fried version here.
INGREDIENTS
Hot sauce
Soy sauce
Olive oil
Corn meal
TVP chunks
To start:
Preheat oven to 400 degrees.
Put your TVP chunks in warm/hot water to soak. They'll be ready in a mere 10 or so minutes. Heat it up to cook faster, if you want.
Meanwhile.. in two small bowls: put 1/4 c corn meal in one, mix 4:1:1 hot sauce, soy sauce and olive oil in the other.
Using one TVP chunk at a time, squeeze out water, dip into cornmeal, then hot sauce mixture, then corn meal again and hot sauce mixture one last time. Place these in your cast iron skillet. Repeat until you've covered each of your chunks.
Cook at 400 for about 10-15 minutes. Turn them once or so, to help them stick less to the skillet. Now, broil for 5-10 minutes, until brown and crispy! This part is crucial if you want get the same satisfaction you get from fried versions. Fried = crispy. So, broil until crispy. It's well worth the extra 5 minutes.
Serve on a bed of spinach or your favorite greens. Celery goes GREAT with hot foods. Have it in a salad with goddess dressing.. or dip directly into vegan sour cream. Your choice. It's great no matter how you eat it.
VARIATIONS
I added some water to the hot sauce mixture to lessen the heat. And it's still fantastic! You can even glob the remaining cornmeal/hot sauce mixture on top of the chunks once you've put them in the skillet. Just remember you'll have to cook them a little longer.
GOT PROTEIN?
Even though we don't care about protein (as you can and do get it anywhere and everywhere), learn more about the low-cal, high-protein content of TVP here.
Subscribe to:
Posts (Atom)