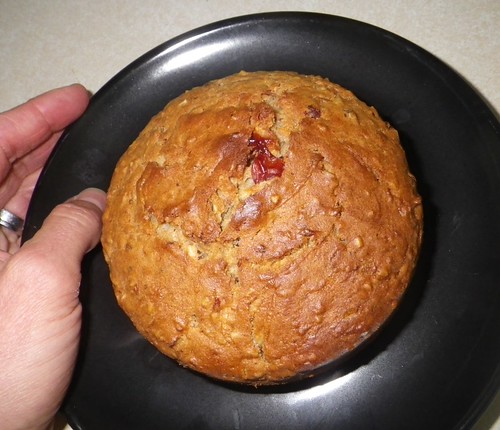
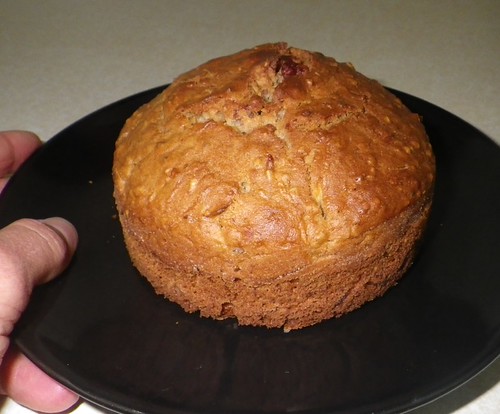
Friday, August 17, 2012

Lingonberry tea cake

Taken almost directly from Plant Based On a Budget. Trust me when I say that you've gotta give this website a try!

IMGP4269

I didn't have orange marmalade (like their recipe called for)... but we try to always have lingonberries in the cabinet. You know, for lingonberry emergencies.

INGREDIENTS

2 c wheat flour
1/2 t baking powder
1/2 t baking soda
2 t flax meal + 2 T water
1/2 c oil
3/4 c raw sugar
1/2 c lingonberry jam (ours is from IKEA)
2 1/2 c grated squash
1/2 t salt
1/2 c steel cut oats

DIRECTIONS

Grate your squash.

In a large bowl mix flour, salt, baking soda and baking powder.

In a small-med bowl mix sugar, oil, flax+water and lingonberries. Mix WELL. Add the squash and mix, mix, mix.

Now pour the oil mixture into the flour bowl and stir well.

Add the oats and stir until just mixed.

Oil your pan(s). You can use one 9"x5" pan or separate them into smaller pans, which is what I did. Leave some room because the bread will rise as it bakes.

IMGP4267

Your house will smell unbelievably yummy. It took all of my willpower not to open the oven early. Wow. Trust me. You WANT this tea cake.

Tuesday, August 14, 2012

Autumn latkes

Another beauty from Vegonomicon. After all, veggies have zero fat.. so sometimes we have to add some, right?

IMGP4238

Delicious!

INGREDIENTS

2 c peeled, shredded beets
1 c shredded carrots
1 c peeled, shredded sweet potato
1 shallot, finely chopped (optional)
1/2 c flour
Up to 1/4 c corn starch
1/2 t salt
Black pepper
1 t fennel seeds, chopped
1/4 c water
Frying oil

DIRECTIONS

Combine your veggies in a bowl and add shallot, flour, starch, salt, pepper and fennel. Mix well! Your veggies should be evenly coated. Add water and stir again until flour is dissolved.

IMGP4235

Form your veggies into balls about the diameter of a quarter. Then flatten them out before frying.

Drain on towels and serve immediately.

*NOTE: I tried to enjoy these with pickles on my veggie burger but I feel the need to mention that fennel and pickles do NOT mix well. In fact, they mix horribly. Consider yourself warned.

Fresh corn and edamame-sesame salad

This is even better when using farm-fresh corn, freshly shaved off the cob. WOW.

IMGP4248

A friend gave us their Veganomicon cookbook recently.. and I've found some pretty tasty recipes in there. Here's one of my new favorites.

INGREDIENTS

2 c frozen, shelled edamame
1 c fresh corn (just shave it right off the cob!)

Dressing:
2 T toasted sesame oil
1 T rice vinegar
2 t soy or tamari sauce

Topping:
2 T toasted sesame seeds (black or white)
Pinch of salt


DIRECTIONS

This is SO easy to make:

Boil your edamame enough to cook. I threw my corn cob into the same water with the edamame to cook a few minutes.

Now drain edamame and corn and run under cool water so you can handle them. Shell all of your edamame. Shave corn directly off cob into your bowl.

Here's the fun part: combine edamame and corn. Add dressing. Mix well.

IMGP4240

Add sesame seeds before putting the entire bowl in the fridge to cool.

This is a large recipe.. so enjoy in your favorite lettuce or radicchio or on a salad.. or anywhere. Yummy!

IMGP4247

Quick pickles

These are as quick to make as they sound. They're easy peasy. But take note: they do not last as long as processed, regular pickles. So, eat up!

IMGP4226

On the left: vinegar pickles
On the right: sweet pickles

INGREDIENTS

For sweet pickles:
1 c raw sugar
1 c white vinegar
1 c water
dash salt
onions (optional)

For savory pickles:
1 1/2 c white vinegar
1/2 c water
1 T sugar
1 t salt
1 T pickle spice

DIRECTIONS

Step 1: fill your jar with sliced cucumbers.

IMGP4220

Step 2: boil your ingredients.

Step 3: Once your liquid has boiled for a few minutes, simply pour directly over your cucumbers. Close your jars and refrigerate.

They'll be ready in 24 hours. See? Easy!

*Using smaller jars? Half the recipe.

IMGP4231

Monday, July 23, 2012

Easy as pie

I love pot pie.

...but I prefer it simply with a bottom crust and no top. My husband, however, wants a solid top AND bottom crust. So we compromised and I only used half as much top crust as he wanted. We'll just save the remaining strips of crust for another pie. Apparently being married means you have to compromise. Who knew?!

IMGP4192

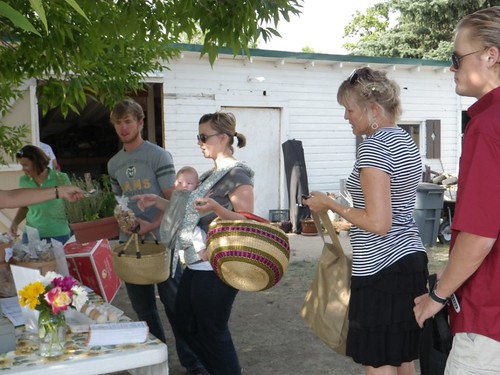
Using local veggies from our CSA, and a few other everyday things we had in the kitchen, we made the yummiest, warmest, most comforting pot pie in quite a while. (We didn't make the crust, of course. What can I say.. I was tired!)

Step 1: buy a vegan pie crust. No, this is not a difficult thing to do. Yes, it will be better than the cheap pie crusts you'll find in a grocer's freezer. No cholesterol. No saturated fat. Perfect. (We still can't believe the pie crusts with lard were about a buck in the freezer section, while this healthy, vegetable-fat pie crust was like 4x as much. Ridiculous!)

But I digress..

Step 2: gather your ingredients. This is a rough estimate of what I used.

INGREDIENTS
Veggies:
2 small beets (we had a red and yellow beet)
1 med-small potato diced into bite-sized pieces
Handful of fresh green beans, rinsed and sliced into bite-sized pieces
2-3 carrots, sliced
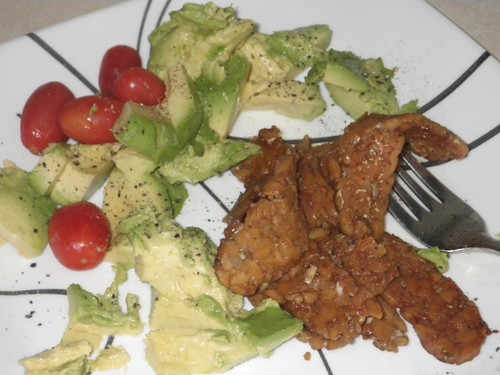
Diced, baked tofu (just follow the recipe but dice your tofu first)

Sauce (you'll want enough to fill in around your pot pie innards):
About 2 c almond mylk
1/2 head of garlic, diced small
1 T onion, minced
1 T whole wheat flour
3 T nutritional yeast
1 t soy sauce or sea salt
Optional spices: fresh thyme, onion,

Step 3: have your tofu pre-cooked or do that first. You can also substitute seitan. Or leave it out completely.

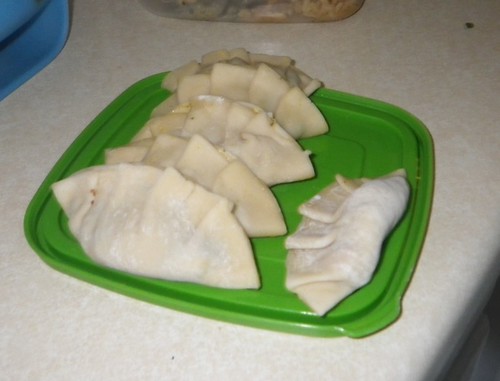
Step 4: let one of your pie crusts thaw and flatten it out. Slice it into thin strips. This will be the top of your pie.

Step 5: mix all of your sauce ingredients in a skillet. *Cook your onions and garlic in a little oil first if you'd like to. Then add remaining ingredients on top. Mix well. Let cook a few minutes until it thoroughly mixes.

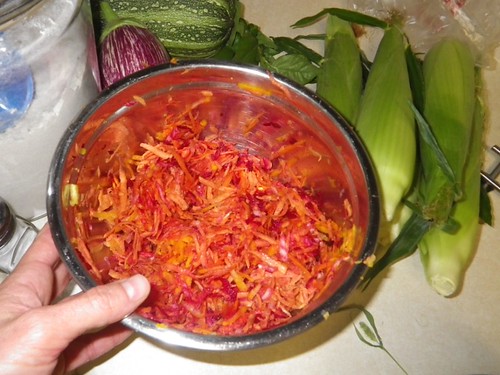
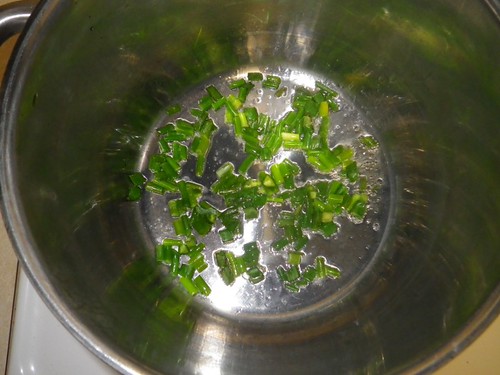
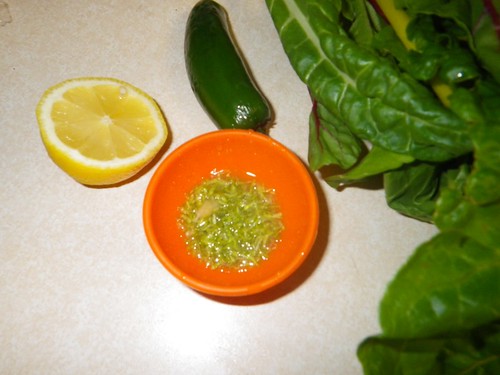
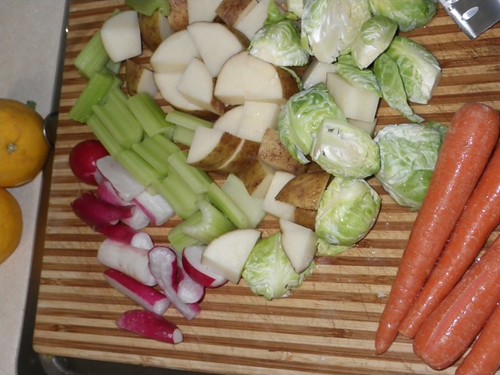
Step 6: rinse and ready your veggies.

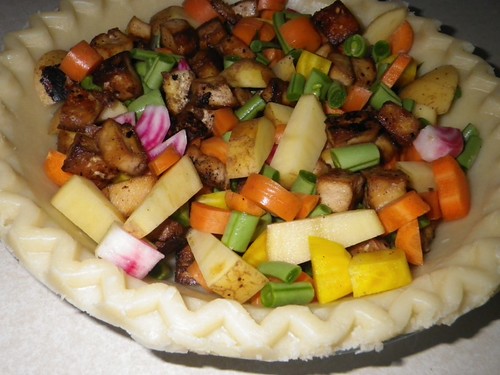
Step 7: now layer as you'd expect. Put your raw veggies in first. Make sure it's filled to the top!

IMGP4189

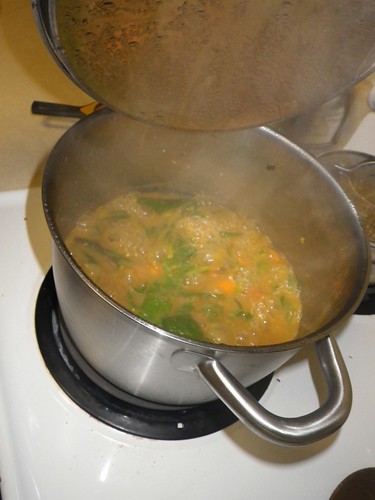
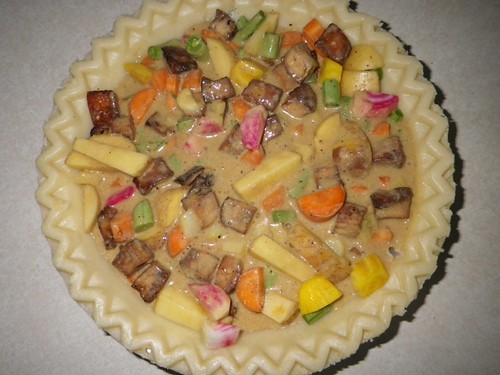
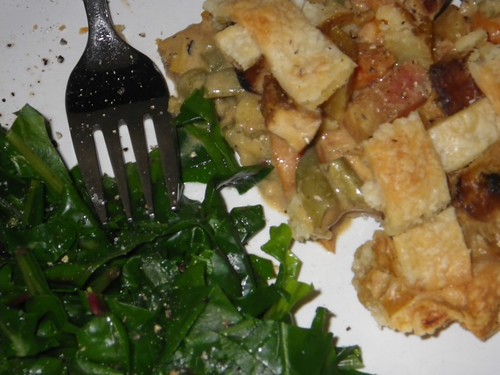
Step 8: now cover with your sauce. *You can see from the picture that I didn't have quite enough sauce so I simply poured extra almond milk on top, to fill the pie to the rim. Your veggies need the extra juice.

IMGP4191

Step 8: Place your sliced pieces of crust in any fashion you prefer. You can even cover with an entire bottom crust.

BAKE

To get a beautiful, flaky crust and perfectly-cooked veggies, you'll want to cook it slowly.

First, 45 minutes at 325 degrees.

Then, 25 more minutes at 350.

Finally, 5 minutes (or until browned) at 400.

IMGP4199

Trust me.. this pie is worth every second.

Enjoy!

Monday, July 9, 2012

Borscht, a summer soup

Borscht is a brightly-colored but lightly-flavored soup. Great for a summer evening when you've got fresh, local, organic CSA beets to devour.

photo

We served it with some crisp bread. It was a great combo!


Serves 2

INGREDIENTS

3 whole beets
1 T olive oil
1-2 garlic cloves
Onion
2 med-large carrots
1 med potato
4 c water
1/4 of a cabbage, finely minced
Juice of 1 lemon
1 t dill
Salt and pepper to taste

DIRECTIONS

Boil your beets whole, skin included. Cook until they can be pieced with a knife and the skin can be removed.

Meanwhile, cut the rest of your veggies so they're ready when the beets are done. Now, sauté your onion and garlic until well done in a large pot. This is where you'll cook the soup.

When the beets are done, cool them so they can be handled. Remove the skin and slice thinly.

Now you're ready to put it together!

Add water, veggies - except cabbage - and spices to your onion/garlic in the pot. Cook until veggies are well done (30-45 minutes). Now add the lemon juice and cabbage and cook another 5 minutes, or until the cabbage is mildly-cooked.

Serve immediately. 

Sunday, July 8, 2012

Roast anything and everything

photo-22

We got a bunch of stuff from our CSA this week.. and we honestly weren't sure what to do.

So, what's my default response to a random assortment of veggies... roasting, of course! It never fails to be fantastic. No kidding. Trust me.


Serves 2. Measurements are approximate.

Ingredients
Olive oil
Fresh garlic (you're going to peel every clove in your garlic head), whole or halved
About 1 c fresh green beans (sliced in half)
1 kohlrabi (peeled and diced)
3 turnips (rinsed and diced)
1 large new potato (diced, not peeled)
Garlic
Soy sauce
Thyme

We served with tempeh and roasted carrots. Delicious!

Preheat your oven to 400 (or so) degrees.

In a bowl, put a few T of olive oil. Now throw in all of your freshly rinsed and sliced veggies until everything has a bit of oil on it. Now sprinkle with your favorite spices.

We got a lot of fresh thyme from the farm.. so you guessed it, we used a lot of thyme! Also sprinkled a little garlic and soy sauce.

Roast 30 minutes. Stir and see how everything is cooked.

Roast up to another 30 minutes - but you probably won't need that long.

Enjoy! 

Roasted carrots

These may be the easiest things you'll ever cook.. and also the tastiest. (Especially if you use local, organic carrots.) No, really.

photo-21

Preheat your oven to 400 degrees.

If they're large, as these carrots were, you'll want to slice them down the middle.

If they're organic, just rinse off the dirt and cut off the hard ends.

Now rub a smidge of olive oil on each carrot. Lay in your cast iron skillet and cover with your favorite spices. There's no wrong way to do this! My favorite combination: sprinkle a little soy sauce on the carrots, lay them in the skillet and sprinkle with thyme and garlic.

Cook 30 minutes. Pierce with a fork. If they're not soft, flip and cook another 15-20.

Enjoy! 

Monday, June 18, 2012

The best waffle you'll ever eat

It's organic cherry season again! Finally!

IMGP3919

We have a tradition at home we call: Waffle Saturdays. It's just as delicious as it sounds, too.

INGREDIENTS

Whole wheat flour
Yeast
Raw sugar
Hot water
Hempseed
Ground flax
Almond/soy/flax/coconut mylk
Optional: 1 small ripe smashed banana

DIRECTIONS

Preheat your waffle iron.

Now gather your ingredients. You'll also need a tiny bowl to proof your yeast and a large glass measuring cup that is larger than 2 cups.

Put a t of raw sugar + yeast + approximately 1/8 c hot water into the small bowl. Let sit 5 minutes.

Meanwhile, measure whole wheat flour up to the 1 cup line in your measuring cup.

Then add to your flour: (approximately) 1 T flax, 3+ T hempseed to flour mix. Next, pour yeast/water/sugar mixture on top of that. Add smashed banana, if using. Now you'll want to add mylk so your batter goes up to the 2 cup line. Stir well! It should be slightly runny, too.

Pour into your waffle iron. Cook as directed.

Serve with tempeh bacon, REAL maple syrup and organic cherries. Trust me on this. Organic fruit, especially cherries, are worth every penny.

Enjoy!

IMGP3912


Curried sweet potatoes and chard

IMGP3932

This is hands-down the best Indian dish I've ever made.

So, grab all of your ingredients before you start cooking. That will make this dish super easy.


INGREDIENTS

Step 1: 
Onions, sliced (I used the green stems only but you could use all of it) 
Garlic scapes, sliced (or fresh garlic if you don't have scapes)
Fresh jalapeno
Sesame oil 

Step 2:
6 c water
1/2 c rice
1/2 c lentils
1 diced large sweet potato 
2 t each: ginger, curry, masala 
1 t cinnamon
More garlic is optional 
1/2 t raw salt of your choice
Up to 1/2 t black pepper 

Step 3: 
2 c washed, 2" sliced chard leaves 

Step 4: 
1 T lime zest
Juice of small lime 

Step 5: 
1/4 c Silk plain, unsweetened yogurt per bowl 


DIRECTIONS

This recipe really is easy once you get the hang of it. 

Step 1: add scapes, onions, jalapeno and some oil to your pot. Simmer until they're well done (less than 10 minutes). 

IMGP3920

Step 2: now add water, rice, lentils, diced sweet potato and spices to the pot. Cook at a medium boil for about 30-45 minutes, or until your potatoes are mostly done. 

Stir periodically. 

Step 3: add your washed and sliced chard leaves to pot. Cook another 10-15 minutes or until the chard is done to your liking. I prefer it to still hold its shape but some people prefer it cooked to oblivion. 

IMGP3928

When working with colorful Indian foods, using an extra tall pot will help prevent splashing. 


Step 4: add lime juice and zest to pot. Stir and let sit a few minutes while you grab your bowls.

IMGP3927

Step 5: put 1/4 c Silk yogurt into the bottom of each bowl. 

IMGP3929

Scoop soup directly on top of the yogurt and stir. 

Delicious! Serve with samosas or pani puri or both. Sometimes we make our samosas from scratch... but sometimes we buy some awesome premade frozen samosas and pani puri from Rice N Spice.

Friday, June 15, 2012

Cheesy broccoli rabé and rice

Guess what our CSA gave us yesterday...

IMGP3903

Broccoli rabé!

I have never cooked with it myself. Learning these new foods is already fun.. and it's only been two weeks of CSA distributions. I can't wait to see what we get next!

Despite how it sounds, broccoli raab is related to turnips, not broccoli. And it sure is tasty. You should know that the stems are VERY hard. So, dispose of the harder stems (or save them for your homemade broth) If using the stems, you'll actually want to cut off the larger bottoms and half or quarter the remaining stems. I know that sounds like work, but you have to thin them out so they'll cook.

Serves 2 as a meal, up to 4 as a side dish

INGREDIENTS

1 c dried brown rice + 2 c water
About 1 c broccoli rabé, cut into 1" pieces
Saltwater to cover broccoli rabĂ©
4 sliced garlic scapes (or garlic, if you don't have scapes)
1 c almond mylk
1 c nutritional yeast
1/2 c rotel (including juice) 
pepper 
Optional: melted margarine added to the chreese sauce

DIRECTIONS

Cook your brown rice in the water until done. About 30 minutes.

Slice broccoli raab and boil in salt water for 5-10 minutes. Drain.

Wash and thinly slice garlic scapes. Begin sauteing. Add broccoli raab. You'll need to sautee the garlic + raab for another 10-15 minutes. That's okay, you're waiting for your rice, anyway.

Set your cheese sauce to cook. Mix almond mylk, nutritional yeast, rotel and pepper. Stir as you add the yeast. Cook on med/low.

Everything should be coming together now!

Once all of your ingredients are fully cooking, simply mix them together and enjoy.

NOTE: you'll want to be careful how much stem you use. It is SUPER chewy. So, I recommend slicing down the length of your stems twice (if you use them), effectively quartering your stems. This should help them cook better.

Tuesday, June 12, 2012

Can you tell what I'm making?

Sneak preview:

IMGP3713

Here's a hint.. from left to right is strawberries, then raspberries, then banana + dates and finally raw cashews.


Monday, June 11, 2012

Arugula.. really?

The best thing about joining a CSA is that it forces you to cook seasonally and step out of your comfort zone.

IMGP3709

[sorry for the bad photo.. I ate the entire dish before I realized my photo was so bad!]

You know we're vegan.. but we've never actually cooked with arugula. Why? There's no reason that I can think of... just that we've just never thought about it. Have you?

Our first distribution last week included a bunch of arugula.. that I had NO idea what to do with it. I googled and googled and finally came to the conclusion that it takes little preparation to use arugula.

INGREDIENTS

3 garlic scapes
1.5 c prepared brown rice + lentils
3 organic carrots, sliced and steamed
Small bunch of arugula
Broth
Olive oil
Salt
Optional: Sriracha sauce

DIRECTIONS

I sliced and steamed the carrots. I prefer mine soft, so it takes up to 20 minutes. But in the meantime you can slice and wash your arugula. Toss any super hard stems but keep the rest.

Something handy to keep premade: brown rice + lentils! Just cook 1 c of each with 4 c water. It keeps in the fridge for several days (though it won't last that long.) Great in wraps, soups and as side dishes.

Once carrots are nearly done, I sliced the garlic scapes (you could also just use garlic if that's what you have) and sauteed in olive oil until browned. Then I added some broth and the arugula. Remember, you'll be adding the rice/lentil mix soon so this should be watery.

Once the arugula begins to soften (this only takes 3-4 minutes), add the lentil/rice and carrots. Add salt and sriracha to taste. *My broth has no salt, so I add quite a bit at this stage.

Enjoy in a wrap or with a fork! 

Saturday, June 9, 2012

Orange-raspberry carrots

I've had this bottle of blush raspberry vinegar for a LONG time and just haven't bothered to open it. Well, tonight I finally did.. and WOW! Flavored vinegars are amazing.

IMGP3686

INGREDIENTS

5 med-large organic carrots (don't even bother peeling.. just rinse and slice)
1 T raw sugar
1/2 t margarine
1/2 t light vinegar (I used blush raspberry)
Juice of 1/4 orange
dash salt

DIRECTIONS

Steam carrots for up to 20 minutes. I like mine pretty soft.

In an easy-to-use mixing bowl mix the remaining ingredients. Once carrots are cooked, put them in the bowl and swirl it around. Once margarine melts, keep stirring and swirling it around until completely covered. Keep warm.

Enjoy immediately if possible but would be just fine reheated.

These are lovely and only lightly sweetened (just how I like them). 

Roasted radishes

For the next few months I'll be posting recipes made with whatever our CSA gives us. This time, for our first distribution, we were given garlic scapes and radishes (among other things.) So, I wanted to put them together.

IMGP3686

[roasted veggies with sliced garlic scapes and herbs, served with slightly-sweetened carrots and chard chips]


Serves 2 (as a meal)

INGREDIENTS

1 very large russet potato
6 Brussel sprouts
4 stalks celery
5 radishes (because that's all I had.. you could actually use more)
3-4 garlic scapes
2 T olive oil
Thyme
Rosemary
1/4 c water
Salt and pepper (optional)

DIRECTIONS

First things first: cut your veggies. I made large potato chunks and only sliced the sprouts in half. I thinly sliced the garlic scapes so they could be eaten with each bite of veggies - however, don't be afraid to slice them in 1" long slices. That would be just as delicous.

IMGP3662

Now preheat your oven to 450 degrees.

In a large bowl put your olive oil and spices. I actually saved the salt and pepper until after they were cooked and ready to eat.

Now add your veggies on top of the spice mixtures. Then swirl your veggies until everybody is covered.

IMGP3664

Bake 20-22 minutes (approximately). Remove from oven. Stir and add the 1/4 c water directly into your roasting pan. Return the veggies to the oven for about another 5 minutes.

I served with homemade chard chips, which I made just like kale chips... except that I've sold my dehydrator so I baked in a convection oven at 400 degrees for 10 minutes, flipping each piece halfway through. *Honestly, kale chips are easier to make and sturdier. But the chard chips sure hit the spot.

We ate all of this alongside a hearty slice of whole grain bread and sweet carrots. What a meal! We will definitely make this every time we get radishes from our wonderful CSA.


Friday, June 8, 2012

Soupy lentil and rice

IMGP3652

I used my veggie broth to make a simple soup for lunch. Honestly, I have pretty simple taste buds.. so I can only experiment with fancy dishes for long before I have to clean my palate.

Wow.

Simple.

Tasty.

DIRECTIONS

1/4 c dried lentils
1/4 c dried brown rice
3/4-1 c water
up to 1 c veggie broth
Salt & pepper

INSTRUCTIONS

Mix water with lentils and brown rice. Bring to boil. Then cover and lower to simmer. Cook approximately 30 minutes until well down.

Now you'll decide just how much broth to add to the mix. I like it soupy. Trust me, your broth will be so tasty that you'll want extra just to drink from the bowl. It's that good.

Top with salt and pepper. It won't take much because you're adding it on top.

Enjoy immediately. This is great with a very-vegetable dish. 

Make your own tasty veggie broth

IMGP3643

Do you buy bullion or pre-made veggie broths? They're tasty and certainly helpful when cooking.. but did you know that you can make your own broth from scratch using nothing but scraps? It's true!

You just use whatever veggie ends, rinds, peels and veggies that you have on hand. For even better flavor, you should consider joining one of your local CSAs. Many cities have them and you'll get seasonal, organic, hand-grown veggies! We've joined On The Vine at Richmond Farms in Fort Collins.

IMGP3514

They offered 10% member discounts to members of the local Vegan Meetup, so we jumped on the savings. Many CSAs offer discounts for 'working memberships' as well. That means you'll volunteer a certain number of hours (set by the CSA) over the course of the summer. This gives you a discount, and gives the CSA the help needed to grow, weed and harvest veggies all summer long. Plus, it's fun!

Our first distribution was yesterday.. and after talking to one of the other working members about her homemade broth I was inspired to make my own veggie broth with a few veggies I already had, plus something new that I've never heard of or used before: garlic scapes. I used this instead of buying garlic bulbs (which is what you'll want to do if you don't have scapes or garlic chives.. I'm told garlic is KEY to making tasty broth).

TIP: Keep a tupperware container in your fridge and fill with your potato peels, zucchini ends, garlic, onion (remember, all peelings included), garlic scapes, garlic onions, bell pepper, jalapeno or whatever you have.... Then, when you need broth you just throw it all together and cook. It's easy. Fast. Tasty.

INGREDIENTS

Any veggies, scraps, peels, rinds that you have
Garlic
Dried spices
Fresh herbs
Raw salt optional

DIRECTIONS

Using a large pot, fill halfway with water. Bring to boil. Add anything you want.

Reduce to simmer and cover. Simmer for about an hour. Strain.

Enjoy your broth! Keep in the fridge in a sealed container and use during the week.

NOTE: Don't be afraid of salt. You NEED salt, especially if you're outside sweating and exercising. However, you should know that I don't add salt when I cook things like this. Normally we add salt only when we're eating. That way you'll use less and taste more. But there is one very important thing to know -- table "iodized" salt is BAD. Bad. Bad. Bad for you. Did you know those perfectly white, symmetrical salt crystals have been cooked at temperatures of over a thousand degrees? That kills anything and everything nutritious in the salt. So when you use those salts, all you're doing is raising your blood pressure. BAD. However, you don't need to feel bad about enjoying tasty raw salts.. pink, black, green, plain sea salt.. you name it! Enjoy them. Use them. Did you know these salts have different flavors and textures? Try them.

Going vegan will open your taste buds to so many new flavors. Go vegan: get happy!

IMGP3596

Monday, June 4, 2012

Chia gel

What is chia gel and why should you care?

IMGP3484

According to Dr. Weil "Chia is very rich in omega-3 fatty acids, even more so than flax seeds. And it has another advantage over flax: chia is so rich in antioxidants that the seeds don't deteriorate and can be stored for long periods without becoming rancid. And, unlike flax, they do not have to be ground to make their nutrients available to the body. Chia seeds also provide fiber (25 grams gives you 6.9 grams of fiber) as well as calcium, phosphorus, magnesium, manganese, copper, iron, molybdenum, niacin and zinc."

HealthWarrior.com explains the benefits of eating Chia.

A 16-oz pouch of chia contains the same as:

  • Fiber of 4 pounds of oatmeal 
  • Protein in 3 lbs of tofu
  • Antioxidants of 2 pounds of blueberries
  • Omega-3s in 10lbs of salmon
  • Calcium in 4 lbs of 1% milk
  • Magnesium of 15 pounds of broccoli

Add chia to anything!.. soups, smoothies, baked goods. You'll notice that it soaks up water.. so, just add more water to your recipe. It really is that easy. This gooey substance is basically what will happen in your belly.. slowing digestion and absorption.

And who wouldn't want that? 

Tempeh joes


IMGP3503

I don't know how I came across Macheesmo.com but he has a tofu sloppy joe recipe that looks delicious! I was ready to throw it together and realized I was out of tofu. WHAT?! How could I let this happen?

I have lots of tempeh on hand so I figured I'd just start there. Tempeh is drier than tofu (obviously) so I did tweak the recipe a bit. Click on his link to see the original and check out my tempeh version below.

INGREDIENTS

1 block tempeh (use gluten-free tempeh for gluten-free joes)
Olive oil
At least 1/2 red bell pepper, diced
2 stalks celery, diced
1 can diced tomato
1/2-1 can tomato paste
up to 1 c water
4 t garlic powder
1 t onion powder (or 1/4 c onion diced)
1 t salt
1 t chili powder
1 t cumin
Optional: pepper

DIRECTIONS

Pour some olive oil into your cast iron skillet. Now, crumble tempeh with your fingers. It separates easily.

IMGP3496

Add diced veggies. Mix and cook until browned.

IMGP3499

Once browned as much as you want, add remaining ingredients (except the water) and stir. The tempeh has no extra water so you'll want to add water to keep your gooey joe mixture very wet. It'll also dry a little more once it cools, so don't be afraid to keep it very moist.

Enjoy on a bed of greens to keep it gluten-free. Or enjoy on your favorite bun. This makes an easy-to-reheat and carry-to-work lunch!


Sunday, June 3, 2012

Gluten-free maple cupcakes

First gluten-free cupcake experience. They're oddly colored from the buckwheat flour, which is a bit blue. Cover them with a little icing and you won't even notice!

IMGP3486

INGREDIENTS

DRY
1/4 t baking soda
1/4 t yeast 
3 T buckwheat flour + 1 T dal flour 
3 T maple syrup 
1 T raw sugar 
pinch salt 
1/4 t yeast 

WET
3 T almond mylk + 3/4 t ACV
3 T chia gel 
1 t almond oil
1 t vanilla

DIRECTIONS

To start, mix 1 t chia seeds + 1/3 c water. Let sit and become gel. Put aside. 

Now, mix almond mylk and ACV and let sit for up to 10 minutes. Then add remaining wet ingredients. 

Next, put dry ingredients into a separate bowl. Add wet to dry and mix well. 

This makes 3-4 yummy, um, interesting cupcakes. They're super mapley and unbelievably moist... that's from the chia seeds! 

It's a great first try. Have tips? Questions? Post them here! 

Gluten-free burger

I'm experimenting with gluten-free recipes because I'd like to go gluten-free for a few weeks. We shall see.

IMGP3495

From what I've been reading this weekend... gluten is EVERYwhere. It's on our cutting board and in our utensils. It's in the shared containers of, say, peanut butter - from when my husband double-dips his knife from spreading the PB on his bread. It's on the countertops and refrigerator doors. It's in shampoos, soaps, and other things that I hadn't even thought about. So, this will be quite the endeavor!

Here's a new gluten-free burger recipe that is quite delicious. I cut it on top of a salad and Tyler enjoyed his with a large potato bun.

INGREDIENTS

1/3 c lentils
1/3 c quinoa
2 1/4 c water

1/3 c chia gel (this is really just 1/3 c water + 1 t chia seeds. Mix and let sit up to 12 hours)

Up to 1 c dal flour (or flour of your choice)
1/2 c nutritional yeast 
1/3 c corn
1/2-3/4 c minced carrot (food processor works well) 
1/2 c finely-diced kale 
1 T garlic
1 t onion 
1 T basil
1 T rosemary 
1/4 t cayenne
1-2 T soy sauce 

DIRECTIONS

Mix rice blend, lentils, quinoa and 2.25 c water. Overcook for 35 minutes until easily squishable. 

Now, add 1/3 c chia gel. Mix together. Let cool and squish some more. 

Just add your remaining ingredients and squish together. 

Don't worry, this batter is STICKY. I mean, it's the stickiest batter I've worked with in a long time. But I fried it in quite a bit of olive oil (because this batter has zero fat added). This keeps it from sticking to your cast iron skillet and makes them quite yummy. Don't cook too quickly, so don't put your oil on too high. 

Cook until crispy!

** Most veggie burger recipes can be made gluten-free by using whole grains like brown/red/black rices and flax instead of eggs. Use a gluten-free flour in place of any wheat flour. If using oats, you'll need them to say specifically 'gluten-free' on the package. **

Monday, May 28, 2012

Steamed dessert dumplings


IMGP3407

I'm honestly not sure if this is a common thing to do with dumplings or not.. but since I'm a fan of steamed foods and I love fruit.. I figured, why the heck not try?

Let me say that I'm so glad that I did! With the freshness of fruit, the ease of a dumpling and the awesomeness of organic maple syrup.. this dessert is amazing.


INGREDIENTS
Dumpling wrappers
Fresh fruit, diced small (I used strawberry)
Optional: dash of raw/whole sugar or dates
Maple syrup


Follow the same directions as for  savory dumplings. You're going to dice your fruit, wrap it in a dumpling wrapper (the more you practice, the easier it is) and cover and steam for 20-30 minutes. I also put some raw sugar inside each dumpling with the berries. Next time I'll dice some dates and put those in the dumpling wrapper instead.

Try them warm.

Try them chilled.

Don't forget to dip in maple syrup.

Whole, organic sugars are the best tasting - and actually good for you. Most people forget (or just don't know) that whole sugars, salts and grains all contain micronutrients that humans can't list because there are just too many. So, stick with WHOLE foods, not bleached-then-fortified foods. Your body will thank you!


Lentil tacos (or burritos or nachos)

IMGP3437

Makes 6-8 tacos

INGREDIENTS
3/4 c dried lentils
1 3/4 c water
1.5 t cumin
1 t chili powder
3/4 t coriander
1 t soy sauce
1/2 t jalapeno (or your favorite hot spice)
1/2 t sea salt

This recipe is so easy, it's almost silly to post it as a recipe:

Mix all ingredients in a pot. Bring to boil, then cover and simmer for 25-30 minutes (until water is absorbed). Serve with freshly cut veggies.

Enjoy!


Friday, May 18, 2012

Dog food

Anyone who knows us knows that we have foster animals coming and going all year long. Well, our recent rescue (from last weekend) is an obese, silly, sweet, needy beagle.

His obesity is probably the reason he has a tumor under his armpit and rotten gums. We have an appointment at the vet soon. We just hope his obesity hasn't caused diabetes -- or any other obesity-related disease.

IMGP3403

Sadly, we believe he was left behind when his oh-so-caring owner graduated college and left town last weekend. I suppose if people abandon their pets when they move, when they foreclose.. why wouldn't students do it, too?

Although for Zoid, whom we saw him rummaging through a bag of garbage last weekend, this was lucky! Now he will get his gums and teeth cleaned, he has started eating healthy (and yummy!) foods and will get his tumor removed once he's lost a little weight. You see, he's not just fat - he's obese. Surgery is just as dangerous for an obese dog as it is for an obese person.

Sadly, we can only assume he has been living on pizza, burgers and beer - or some equally unhealthy combination of foods. And he may have gotten many of those meals out of dumpsters because he always takes us there on our walks.

Luckily, he loves loves loves loves broccoli. Just raw, sliced broccoli. No kidding. Most dogs love green beans. Many love carrots. Some love chickpeas. A friend's dogs absolutely LOVE watermelon. You just have to keep trying until you find out what your own pooch loves.


NOTE: I prefer softer tofu but Zoid prefers pressed. You can purchase pressed tofu at any Asian market. It's super inexpensive, too! Or you could also try pressing firm tofu that you buy at the grocery store. Open and drain package. Wrap the tofu with a hand towel and put something hard on top, like a skillet. Let it squeeze out the water. Now place in a container and freeze solid. When you want to use it, simply thaw and squeeze out any remaining water. You'll notice the texture is firmer and stringier. It can give you variety with your tofu, too! Try it. You might like it.


Dog food 1:

INGREDIENTS
Pressed tofu
Cooked lentils
Cooked oats or brown/red/black rice
Sliced raw broccoli
Dash turmeric
Dash soy sauce
Pureed pumpkin on top

I cube the tofu small and mix with turmeric. Then cook with extra olive oil -- this is the only fat in this meal, so don't be afraid to use it. Now, mix with your other ingredients. Serve warm.


Dog food 2:

INGREDIENTS
Cooked black beans
Cooked brown rice
Sliced, raw broccoli
Sliced cooked or raw zucchini (however your dog prefers)
A few sliced carrots
Pureed pumpkin on top


Dog food 3:

INGREDIENTS
Pressed tofu
Cooked lentils
Cooked peas
Cooked, diced potatoes
Sliced raw broccoli
Dash soy sauce
Pureed pumpkin on top

This time put soy sauce on the tofu cubes. Cook with extra olive oil until well done. Mix with remaining ingredients.


Dog food 4:

Nutritional yeast is chocker-block full of nutrients. You enjoy it - so will your pooch!

Simmer 1 c water with up to 1/2 c nutritional yeast. Sprinkle with salt. Add cilantro if you want.

Option 1: Pour this over some squished black beans.
Option 2: Pour this over boiled and sliced veggie dogs for a treat!
Option 3: Slice corn tortillas (Zoid LOVES corn tortillas), cover with some squished black beans and nutritional yeast sauce.


IMPORTANT NOTES
Just like us, dogs are NOT obligate carnivores. They do not need meat, saturated fat or any milk. Each meal should have some form of fat, protein, vitamins and moisture... and all of that can and should come from plant sources.


Rosemary basil fries

If you're like my husband, you prefer fried fries. Who doesn't, right? But we only fry the when we've done something particularly active - like cycling, hiking or some heavy remodeling.

Instead, we bake them:

IMGP3402

I love mixing sweet potatoes with russet or red potatoes. Just note that russet take longer to cook than most other potatoes.

Serves 2

INGREDIENTS
1 sweet potato
1 russet potato
Basil
Rosemary
Salt
Dash of olive oil


Preheat your oven to 375.

You'll want to slice your russet potatoes thinner than your sweet potatoes, to even out the cooking times. Slice them into long fries or short fries or even wedges. Peel your sweet potato and slice. Wash and do not peel your other potato.

Have your large bowl read with about 1 T olive oil. Throw your fries in there and mix. Now sprinkle with a lot of rosemary and basil and a little salt.

Put a single layer of fries on your cooking sheet. We actually cook on our cast iron skillets. Anything will work.

Cook 30 minutes at 375. Now flip all of your fries and increase heat to 400. Cook up to another 30 minutes or until brown.

Enjoy immediately.


Wednesday, May 16, 2012

Steamed dumplings

Who knew making dumplings was SO easy? I sure didn't.

IMGP3396

Stop by any local Asian market and you'll find these inexpensive, round wrappers.

All I did was google "how to wrap a dumpling". I could make a video or take photos.. but why reinvent the wheel, I say? You'll find out just how easy this is.

IMGP3389

You can use ANYthing you want for the filler. Make it sweet for a dessert. Make it savory. Flavor with masala (which is what I did). Use extra garlic. Really, the possibilities are endless.

To make them like this, simply chop into very small pieces 1 potato, 1 zucchini, 1 carrot and cook some brown rice. While still warm and after they've become slightly overcooked mash your potato. Then mix with the veggies, rice and a little masala and soy sauce. The mashed potato holds your dumpling contents together very well.

IMGP3392

DO NOT OPEN WRAPPERS UNTIL YOU'RE READY TO WRAP. You don't want them to dry out at all.

Now, following the directions in any of the zillion youtube videos you just found, place the filling inside one wrapper and gently make your dumpling. Trust me, it's easier than you think.

Let your dumplings air dry for a few minutes so they stiffen up a little. Place in a large bamboo or metal steamer. Cover and cook for 15-20 minutes.

Enjoy immediately.


Tuesday, May 8, 2012

Fake your bacon


IMGP3277

Tempeh-bacon, avocado and grape tomatoes make a delicious breakfast. Use all of the raw salt and pepper that you want.

We've all heard people say "I just could never give up meat" or "I love bacon too much" .. when in actuality what they mean to say is, "But it's something I've always done" or "I don't know what goes into my food but I love the way it tastes." 

Truly, all of those wonderful "meaty" flavors that people love are spices. Every region in the world has a different variety of "normal" spices. Replicating those spicy flavors using healthy (and cruelty-free alternatives) is tasty, wonderful for your body and well, it also means that we vegans eat well. We eat VERY well.

INGREDIENTS
Tempeh (any variety)
Molasses
Mesquite powder 
Soy sauce 

Slice your tempeh very thin. Place one layer of your tempeh in a bowl. Sprinkle with soy sauce until every piece is lightly wet. Run molasses up and down the strips. If you've never worked with molasses, this can be tricky! Go slowly. Once the molasses starts flowing it's hard to stop it. Then, sprinkle with mesquite powder. 

Now, place your next layer of tempeh on top of that one. 

Repeat previous steps until all tempeh is layered and soaking in these wonderful juices. 

Cook on a hot caste iron griddle until brown on both sides. Use a small amount of oil as necessary.

Monday, May 7, 2012

Samosas (baked or fried)


While nothing compares to the food we had in India.... I have to give it a try. It's certainly too far to commute!

P2029537

Samosas.. Oh, how we miss you samosas. So, here's our first (and pretty tasty) attempt. 

IMGP3323

There are a few layers to this recipe. You make a dough. You boil several veggies. You even mash one. Don't get overwhelmed. It's much easier than you imagine it to be... and worth the effort. 

Serve with 1/2 recipe of dahl for two people. Make a larger serving of dahl and you can spread the samosas around to serve more people. Either way, it's delicious!

INGREDIENTS 

Dough
------
1 T wheat gluten
1 c wheat flour
water
dash salt
2 t oil


Stuffing
------
2 medium potatoes (boiled, peeled and mashed)
1/4 c carrots (diced, boiled)
1/2 c green peas (boiled)
1/4 c boca crumbles, cooked with onions or onion powder and spices, if you like it spicy 
1 t Garam masala (or more if you're adventurous!) 
1 green chili 
1 t ginger
1 t chili powder
1 T coriander
handful cashews
salt to taste
Other recipes also call for dried mango powder but I don't have any...


Step 1: Make your dough and set aside under a moist cloth. Basically, mix the ingredients listed and begin adding water a little at a time until you have a ball of dough. **I use wheat flour, not all-purpose flour. If you use all-purpose flour, you can leave out the gluten. 

Step 2: Peel and boil the potatoes. Mash. 
Step 3: Boil peas and carrots. Drain.
Step 4: Cook boca (if using). 

Step 5: If baking, preheat oven to 375 degrees. We baked half and fried half. You've probably guessed the fried ones are the golden, dark color. I won't lie.. the fried ones are deliciously-fried. But the baked ones are great, too. 

Step 6: Add your peas, carrots, boca (if using) and all spices to the mashed potatoes. Set aside. This is your filling. 

Step 7: Now, pinch off a small ball of dough. I used a 4" (appox) sized glass bowl as my cutter. I rolled out a small dough as thin as I could get it and cut out a circle. Put the excess back with the rest of the unused dough. Use extra flour to keep it from sticking to you and whatever surface you are using. NOTE: You can make large samosas, small samosas or any size samosa you want. Don't be afraid to try this recipe. You won't mess it up.

Step 8: Put about 3-4 T of filling on each round of dough. Pinch all the way around. I used a fork to ensure it closed. Run each seam under a small amount of water. Set aside to dry. 

Repeat for all 8 samosas. 

Step 9: Bake 15 minutes on each side. Or fry until golden brown. 


P2029568


Don't forget to serve with your favorite chutneys!