Monday, April 25, 2011

Homemade fruity granola

P4241201


A few notes on making your own granola:

*Use whatever fruit you have on hand
*As you dice, keep fruit juice in bowl. You'll add all fruits and nuts to the juice to soak before dehydrating


INGREDIENTS

Dice 1 pineapple
Dice 6-10 champagne mangos
1 bag frozen cherries
Raw almonds, cashews, pumpkin seeds, sunflower seeds
Oat bits (see below)
Optional: Hemp, chia and flax seeds, buckwheaties


PINEAPPLE AND CHERRIES

Let pineapple and thawed cherries soak in the pineapple juice a few hours or overnight. *If someone has a reaction to nuts, like almonds.. try soaking them in water overnight, then rinsing. Add to recipe as usual (while wet is fine). This should reduce or eliminate most mild reactions to nuts. It worked for my husband! He always got an itchy/fuzzy tongue after eating nuts.. so I soak and dehydrate all of our raw nuts before eating or using in a recipe.

Now, put pineapple and cherries on dehydrator tray. Your pineapple bits will be a beautiful red-tipped color by now, too. It's gorgeous!

NUTS AND SEEDS

Now, add all nuts and seeds to remaining juice in the bowl. Let them soak for at least a few hours. Once they're saturated, put on dehydrator sheet and douse with sea salt.

MANGOES

Slice and get all mango pulp out of mangoes. Yes, it's a grueling process - but soooo worth it. Mangoes are one of the best fruits in the world. I just spread out the juicy pulp on dehydrator sheets. Some thinner spots, some thicker spots. I didn't cut anything, just spread it around.

OATS

For the oats, I just wet the remaining oatmeal oats (not raw, but pressed) with enough water to be sticky. Then, added about 1 T agave nectar and sea salt. Make little bunches of oats and press them out on the dehydrator tray. No need to be perfect. This can be messy. Then you'll get different sizes of oat bits.

Dehydrate everything at around 110 until dry.

Once done, store in an air-tight container in the fridge.

OPTIONAL

You can also add chia, buckwheaties, hemp and flax seeds for extra nutrition and crunch! Sprinkle it on. I promise, you can't mess it up.

All raw. All fresh. Filling and yummy!

Easy raw oatmeal breakfast or snack cookies

P4241206

Raw cookies are absolutely amazing. They're easy to make, ready in just a minute. Though you can dehydrate for a few hours to thicken them up or melt your (not raw) chocolate chips.

Store in the fridge in a sealed container. Yummy! Cookies for breakfast? Yes, please!


INGREDIENTS

VERSION 1:
1 c raw oats, broken apart in your food processor/blender
3/4 c dates
1/4 c raisins
cinnamon

VERSION 2:
1 c raw oats, broken apart in your food processor/blender
1 c dates
1/4 c chocolate chips
cinnamon


Either way you go, these are easy. Unfortunately, my food processor blades are clearly dull. I had no idea until I tried to crack my raw oats! They just stirred them around.

Don't worry, raw oats are quite tasty and easy to chew. Yum.

Blend dates and oats well.

Add cinnamon and raisins or cinnamon and chocolate chips - by hand.

Squish, squish. Roll, roll.

NOTE: They're easy to make if you use wax paper. These are very, very sticky so the wax paper helps keep it under control. I did have to wash my cookie cutter halfway through to remove the stickiness. Also, I added a handful of regular oats (like you'd buy for oatmeal) to the last half of the chocolate chip cookie batch. They were just so sticky that I couldn't roll out the dough! I mixed in the oats and used them to keep everything from sticking.

Use your favorite cookie cutter. Put on dehydrator sheet, if you want to squish your chocolate cookies. It makes them melty and you can serve them warm out of the dehydrator. Yummy!

Store in the fridge in a sealed container.

Saturday, April 23, 2011

Raw Nestle Crunch

There is nothing simpler than making homemade nestle crunch-like candy bars.

Absolutely nothing!

INGREDIENTS

(Please note, these are approximations. Don't stress over a little change!)

1 c melted cacao butter
1/2 c ground cocoa powder
2 T maca powder
3 T mesquite powder
2-3 T agave nectar
Crunchies: Buckwheaties, raw nuts, raw fruit bits.. be creative!


Melt cacao butter. Once COMPLETELY melted, add cocoa, maca, mesquite and agave. Mix well. To keep it raw, melt easily in hot/warm water double-boiler. I put a mug in my hot water. Keep it very low heat and stir until completely melted.

Yes, it's messy.

P4231184

Love chocolate? Invest in a $2 chocolate mold from Hobby Lobby, like this one. It has square shapes that'll make it much easier to break off one serving at a time.

P4231191

Once you've poured your chocolate.. use buckwheaties, nut bits or even fruit bits.. whatever you prefer!

** This amount of chocolate will fill several chocolate molds. So, quarter the recipe if you want to try just a little. **

Friday, April 22, 2011

Raw Ice-Cream Snickers

A perfect treat for summer!

raw frozen snickers

Who doesn't love a frozen candy bar? Like you, we do love to indulge in half a candy bar for dessert more often than we should.. so, I thought I'd try to make a better version using whole sugars. Our premade candy bar of choice? Jokerz, of course! Check out Go Max Foods. You can't go wrong. We split in half for a decadent, easy dessert.

But if you want a healthier candy-like bar that you can share with your kids (including making them).. try this on for size.

Go ahead, lick the spoon! That is, if you can get it away from your kids. Good luck!


INGREDIENTS (to fill entire pan)

About 25 dates
About 3/4-1 c diced walnuts
4 ripe, large avocados
3/4 c agave nectar
3/4 - 1 c cocoa powder

DIRECTIONS

Remove pits and blend dates in a food processor or by hand. I used medjool, so they're easily squished by hand if you want. Squish dates into candy bar molds, so you have an even distribution. (Next time I might add a few more dates. The caramel layer is fantastic!)

Now, sprinkled chopped nuts. I prefer raw pecans. Healthy and delicious!

P4221154


Blend avocado, agave and cocoa in food processor or blender. This is your ice cream. Go ahead, lick the spoon!

Pour ice cream over dates/nuts. Fill each container if you want.

Now, freeze for at least 8 hours. This will make your candy bars sturdy enough to work with so you can coat with a hard layer of chocolate.

When you're ready to coat your candy bars, you'll need to melt your chocolate coating.

NOTE: You don't * have * to do this last layer. However, it'll give your candy bars a coating. Otherwise it's super melty. That would still be fun, though. And they taste great either way. (You know we sampled between layers, so I can promise you that it's still tasty.)


To add the outer, crunchy layer:

INGREDIENTS

1 c melted cacao butter
1/2 c cocoa powder
2 T maca powder
3 T mesquite powder
2-3 T agave nectar

P4231165

Melt the cacao butter by breaking it into fairly small pieces and putting that mug into some semi-hot water. Have your other ingredients ready - cocoa, maca, mesquite and agave.

Once the cacao butter is melted, simply add the remaining ingredients and mix well.

You'll need to remove the candy bars from the freezer - ONLY when you're ready to dip them.

Dip half of each one, put back on wax paper and refreeze a few minutes before dipping the other side of the bar. Dip twice for a thicker coating.

The result?

Soft, squishy ice cream on the inside.. and nuts and caramel, like a frozen snickers.. and a crunchy, thin chocolate coating on the outside.

Store in freezer, wrapped individually but in a sealed container. We find they're best shared.. and they slice easily. Yummy. They're rich, so sharing is easy!

Indulge without guilt!

Sugar-free (but sweet) Oatmeal

P4221152

I'm a huge fan of warm breakfasts, even in summer. I love millet. I love oatmeal - no matter what kind. Change the fruits, add cinnamon, there is endless variety!

Serves 1

INGREDIENTS
1/2 c oats (not quick)
1 c water
1 date, diced small
3/4 c diced strawberries (or fruit of your choice)

You can easily double or triple this recipe for more people. Don't worry, you really can't do it wrong!

Mix oats and water on stove. Start bringing to boil.

Add diced date. Mix well.

Add fresh fruit! NOTE: If using frozen fruit, you must thaw first. So, you can heat that up in the pot before adding oats and water to it. That works fine.

Enjoy!

Monday, April 18, 2011

Oh, Vegan S'mores .. how I love you

Thanks to Chicago Soydairy, we had a wonderful, yummy, scrumptious, sugar-rific camping trip this weekend!

dandies2

You, too, can enjoy skin-less, animal-less, tasty vegan marshmallows! It's easy. If we can find them in Northwest Arkansas.. so can you!


INGREDIENTS

Cruelty-free, awesome Chicago Soydairy Dandies marshmallows
Graham cracker of your choice
Dark chocolate

You know the drill...

smores

I think you can safely call that a cajun-style marshmallow, don't you?


NOTE

We actually put our grahams, each with a square of chocolate, into our cast iron skillet. We placed that on the fire for a minute or two to soften the chocolate. It warms the grahams and melts the chocolate. YUMMY!

Low-fat super hot super wings

It's true, my husband will fry everything we eat if I let him. Do you have the same problem at your house? Well.. when he's at work, I try to experiment and make lower-fat versions of the foods he makes for us. Sometimes it works, sometimes it doesn't.

This time it did!

P4181075

Don't worry, you can still get the fulll-fat, full-fried version here.


INGREDIENTS

Hot sauce
Soy sauce
Olive oil
Corn meal
TVP chunks

To start:

Preheat oven to 400 degrees.

Put your TVP chunks in warm/hot water to soak. They'll be ready in a mere 10 or so minutes. Heat it up to cook faster, if you want.

Meanwhile.. in two small bowls: put 1/4 c corn meal in one, mix 4:1:1 hot sauce, soy sauce and olive oil in the other.

Using one TVP chunk at a time, squeeze out water, dip into cornmeal, then hot sauce mixture, then corn meal again and hot sauce mixture one last time. Place these in your cast iron skillet. Repeat until you've covered each of your chunks.

Cook at 400 for about 10-15 minutes. Turn them once or so, to help them stick less to the skillet. Now, broil for 5-10 minutes, until brown and crispy! This part is crucial if you want get the same satisfaction you get from fried versions. Fried = crispy. So, broil until crispy. It's well worth the extra 5 minutes.

Serve on a bed of spinach or your favorite greens. Celery goes GREAT with hot foods. Have it in a salad with goddess dressing.. or dip directly into vegan sour cream. Your choice. It's great no matter how you eat it.


VARIATIONS

I added some water to the hot sauce mixture to lessen the heat. And it's still fantastic! You can even glob the remaining cornmeal/hot sauce mixture on top of the chunks once you've put them in the skillet. Just remember you'll have to cook them a little longer.

GOT PROTEIN?

Even though we don't care about protein (as you can and do get it anywhere and everywhere), learn more about the low-cal, high-protein content of TVP here.

Sunday, April 17, 2011

Fruity millet

Millet is highly underrated. It's amazing. It's versatile. It tastes absolutely amazing. In short, this may be the best breakfast in the world. I LOVE it.

... would make a great dessert or snack, too. I could eat it any time, to be honest.

P4160986


This makes 3-4 servings. Add more fruit in the bowl to make more servings!

INGREDIENTS

1 cup millet (total calories: 750)
2+ cups water

1+ cup unsweetened soy milk (total calories: 70)
1/4 c sugar
1 t cinnamon
1 banana, split into two bowls (total calories: ~100)
raisins (calories per 1/4 cup: 130)
cranberries (unsweetened, calories per 1/2 cup: 136)
currants (calories per 1 cup: 63)
optional: or your other favorite dried fruit


DIRECTIONS

Bring your 2 cups water to boil. Add millet, cover and simmer. You want most of the water to soak into the millet and for it to remain a little crunchy. Everything I've read online says it should take 25-35 or more minutes.. but for me, it took only about 18 minutes. Weird.

But, that's when you add the soy milk, sugar, cinnamon and dried fruit of choice.

In a bowl, I sliced the banana. Now, once the soy milk millet mixture has re-heated.. it's done! Pour over fruit. Keep it soupy. It's way better. :)

Enjoy!

Friday, April 15, 2011

Chili for the dogs

YUM!

P4150971

I made this chili specifically for our hot dogs this weekend. I wanted small chunks in the chili, so it doesn't completely fall out of the bun. And you know, I've never been a huge chili bowl fan.. but this may change that. All I'd do is boil some potatoes, celery and carrots and add to this for a nice bowl of chili. Maybe I just don't like canned stuff.

INGREDIENTS

1 c fire roasted tomatoes, minced
1 c beans (I used 3/4 c red, 1/4 c black)
1 bag boca crumbles (they are pre-seasoned)
Approximately: 2 c water
1/2 jalapeno, diced small
3 T chili
2 T raw sugar
1 T paprika
1 t cayenne
1-2 T garlic powder
1/2-1 t onion powder (more if you like; I'm not an onion fan)
1 t coriander
1 T cumin
3 T basil
4 T cilantro
1-2 T rosemary
1/2-1 t crushed red pepper
optional: 1 t chia seeds


I made the beans from scratch. So, either way.. have your beans ready or open your can of beans. Thaw your boca crumbles. (You could just as easily use TVP from scratch.)

I used Boca crumbles, so this was VERY easy.

Step 1: heat crumbles in cast iron skillet with about 1 cup water. Once thawed, add another cup of water and beans. Now add all of your spices and stir. If it's too dry, add some water. If it's too wet, add some chia seeds or just stir and cook longer. It'll soak up some water, get thicker and marinate in its own juices.

Step 2: enjoy!

See how easy fresh chili is?

VARIATIONS

I purposely left out big chunks so this would fit better on veggie dogs. So, to make it a meal just start by boiling diced potatoes, carrots and celery. Set aside and have ready to add to this chili.

Fruity-mac Snacks

This may be the most beautiful batter I've ever used!

P4130931

INGREDIENTS

1/2 c flax seed, then grind
3/4 c macadamia nut, then grind

1/4 c chia
1 t agave
1 1/2 c water

1/4 c cranberries
1/4 c buckwheaties
1/2 c cranberries
1/4 c currants
1/2 t vanilla
dash salt


DIRECTIONS

Soak chia in agave and water. Try soaking them for 1/2 - 1 hour while you're gathering your ingredients.

Meanwhile, grind your measured flax and macadamia nuts.

Once your chia is soaked, add your fruit, vanilla, salt. Mix well by hand.

Now add pumpkin seeds and buckwheaties. Beautiful, right?

This should cover most of one tray in an excalibur. Score before putting into the dehydrator - or get fancy and use cookie cutters! I have it on 110 and will dehydrate until mostly crispy.

Now do you see how beautiful it is in person? Wow.

P4140947

After about 4 hours it was solid enough for me to turn it over and remove the keflex sheet. Dry until it's as crispy as you like. I left them in overnight, and a little longer.

These are excellent fresh out of the dehydrator! The sweetness of the fruit, the delicate flavor of the batter.. yum!

VARIATIONS

Make the prettiest pb&j you and yours have ever had! Try it with any of your favorite nut butters and jams or fresh fruit.

Try using different dried fruits!

Don't like pumpkin seeds? I bet sliced almonds would work just as well.

Choco-berry snackers

I've been searching the internet for an acceptable chocolately, cripsy/chewy, fruity, vanillay recipe.. and haven't found anything. In my desperation, I threw this together!

Raw foods are so dang beautiful. Have you ever noticed that?

P4130927

INGREDIENTS

1/4 c chia seeds
1 t agave
1 1/4 c water

1/2 c dried fruit, chopped

1/2 c cacao nibs, then grind
1/2 c flaxseed, then grind

1/2 c buckwheaties - which are soaked, sprouted, dehydrated buckwheat groats (or, in a pinch, sub 1/2 c chopped raw nuts of your choice)

dash salt
1/2-1 t vanilla


To begin, soak the chia, agave in the 1 1/4 c water. Let it soak up to a hour if you want, while you gather your other ingredients and grind your cacao nibs and flax.

Next, I ground the flax and cacao nibs - to as fine of a powder as you want. If you leave it coarsely ground, your nibbles will have more texture. For a smoother texture, grind completely.

Once chia is swollen and soaked.. add vanilla and salt. Mix. Now add chipped dried fruit. I used strawberries that I was dehydrating from yesterday. I like to take them out of the dehydrator before they're totally dry, otherwise they're hard. So, my fruit still has a tiny bit of moisture. I just chopped it into tiny bits.

Add the fruit to the chia mixture. Mix by hand.

Now add your flaxseed and cacao nib mixture. Mix by hand completely. It should be a *very* thick dough at this point.

Once it's completely mixed, add the buckwheat groats. They'll give the nibbles a crunch! Don't have buckwheat groats? Don't worry. You can use any raw nut or seed you have around. (but buckwheaties are a lighter crunch!) What about sunflower seeds? or crushing almonds? Whatever you want to do.

Spread on dehydrator sheet. Today, I was actually wishing I had cookie cutters! These would be so cute as little shapes. Ah well, maybe next time.

I left the batter fairly thick, about 1/4 to 1/2 inch thick. Either use your cookie cutters or score it before dehydrating. Don't worry about cutting through the strawberries in the scoring lines. You can always slice them later completely. This will just define your snackers' shape.

Dehydrate 105 to 115 until done! After about 4 hours it was solid enough for me to flip over and remove the keflex sheet from underneath. It dried faster than I expected.

Raw crackers and snacks tend to be dry. Without preservatives, this is just a way to keep them fresher, longer. So, serve with a touch of soy nut butter and jam! (We prefer soy nut butter over here but you can use anything you have or prefer.) Makes a great breakfast, snack or dessert!


IDEAS?

Dip in the caramel dip! Have with raw ice cream! Crush and have on yogurt or ice cream, if you don't have raw ice cream. These are just crunchy, healthy snacks and desserts for you and yours.

Or, leave them slightly moist and store in an airtight container in the fridge as gooey cookies!

Enjoy!

Thursday, April 14, 2011

First meal: easy, amazing soup

Soup may be the best thing on the planet. It's easy to make. It's unbelievably tasty. There are infinite variations. It's warm and soothing. In short, I LOVE SOUP.

P4130936

INGREDIENTS

6 c water
1 potato, diced
1 carrot, diced
1/2 c corn
1 1/2 c fire-roasted tomatoes
3/4 c beans
1/2 c cabbage, chopped small
1 T olive oil
3 T vegetable bouillon
1/2 t Thyme
1 t garlic
1/2 t salt
1/2 t paprika
1/4-1/2 t cayenne
1/2 block tempeh (marinated with soy sauce and olive oil)


DIRECTIONS

First, cut into cubes and marinate your tempeh. Set aside and add to soup at the very end.

Bring water to boil. Boil potatoes for about 5 minutes. Then add carrots and keep boiling for another 5 minutes.

Then, add corn, beans, tomatoes and oil and spices.

Make sure your potatoes and carrots are the right texture. If you do, add the tempeh last - and heat up. Voila!

Make sure the soup is spicy enough and enjoy!

This was my first meal after not eating for a week.. and it was heavenly! Top with a fresh avocado. It cools the heat and just accents the soup unbelievably well.

TIPS

Use whatever you have on hand. Have another veggie? Use it instead!

Tuesday, April 12, 2011

Un-cooking while fasting?

Yes, that's exactly what I'm doing! My fast isn't over until tomorrow night, around 7pm. So.. I am just preparing.

I wanted to surprise my sweet husband with a treat, for being so wonderful and taking such good care of me on the days I was a bit wobbly (days 3-4) and just for always telling me to relax while I'm fasting - even though, honestly, I feel so good today that I don't even feel like I've been without food for 6 days!

So.. what was I making, you ask? CANDY! and dehydrated fruit.. but that will take a day or two to complete.

P4120917

Dehydrating fruit is so beautiful, isn't it?

My first experiment with dehydrating cranberries was a total bust. I hope I did it right this time! Last time I just put two bags of cranberries onto the dehydrating sheets, turned it on and walked away. I checked on them after 5 hours, after 12 hours, after 24 hours.. no change. Maybe cranberries have an amazingly impermeable skin? Then I realized that every time we buy cranberries from the store, they're always sliced in half. Well, maybe that's the key! So, that's what I did this time. I sliced individually.. well, a whole bunch of cranberries.

I've also sliced and added cinnamon and a tiny amount of raw sugar to the bananas. 'Banana chips' at the store are not dehydrated. In fact, they're super fried. (But my husband says that's why he likes them.. and I believe him!) So, I'm trying to get him to like dehydrated bananas as much as I do. They're not chip-like. They're actually gooey and fantastic. If you've ever been to a Trader Joe's and had their 'smooshed bananas' then you know what I mean. It's like an orgasm in your mouth. I swear! So, I also have a few bananas in the back that I've smooshed. But in an effort to get Tyler to like my dehydrated chips I've used a ton of fresh cinnamon (his favorite) and a little sugar. So, we'll see!

The bottom row of the dehydrator is just your standard frozen strawberries waiting to be dehydrated. Yummy yum yum. If only I had done that before I made this candy.. I could've covered them in raw chocolate as well!

......

But now onto the stuff we've all been waiting for, right? Chocolate!

P4120918

I've had a 16 oz block of cacao butter for a few months now and just haven't gotten up the courage to try it out. I mean, it was $20 bucks for the block. It sounded expensive, right? Well, I spilled about 1/2 cup of melted cacao, so I'm not including that. But just looking at the ingredients and how much candy I just made.. that $20 bucks is a steal!

Cacao butter is the fat that comes out of the cocoa bean, when you separate out the chocolate. It's hard and solid at room temperature. So, you can make candies just like you'd buy from the store.. except these are good for you!

I watched an online video of Ani Phyo.. she makes this look so easy! Most chocolate candy recipes are the same when you look around online. But I took mine mostly from Ani Phyo.

INGREDIENTS

About 1/2 block cacao butter, grated like cheese (you want 1 cup when melted)
1/2 c cacao powder
1/4 c mesquite powder
2 T maca powder
2 T agave nectar
Dash vanilla

FILLINGS (optional)
Raw walnuts
Raw pecans
Dried fruit
Buckwheat groats (it will be like rice crispies in chocolate)
Nut butter (if you want peanut or almond butter cups)
.. you get the idea. Whatever you like in your chocolate, have that on hand and ready.

This is so much easier than I expected, too.

Shave your cacao butter. You can shave the whole block if you want because it'll keep in either form. Melt enough to get 1 cup melted cacao. I did this by putting my cacao flakes into a mug, and I put that much in hot water.

While it's melting, grab all of your other ingredients.

Now it gets easy!

Mix everything into the melted cacao. No, seriously. That's all there is to it.

The first thing you'll notice is that I don't have special equipment or special molds. I bought this little lime green one when it was on sale, to try it out. If it works, I may go back and get another.. just to keep portion sizes down. (This is why you'll see that I don't fill the larger containers up. Just because you're using something larger, doesn't mean you have to fill it up completely.)

So, here goes...

First, I used a spoon to put a small amount of chocolate into the bottom of each of the holes. I tried to gauge it so that I used half of the chocolate.

Now, I let it cool for just a few minutes and then I threw random nuts or fruits into each hole. Some are cranberry, some are walnut, almond or buckwheat groat. And SOME.. I made into peanut butter cups! Oh yes. I had a bit of a time getting the almond butter to behave. But I'm sure it'll taste just fine.

P4120899

After that cooled for just a few minutes - and I kept stirring my bowl of liquid chocolate, to keep it liquid - I spooned the remaining chocolate onto some of the fillings. Voila! Easy, right? (Now I realize it's prettier with the filling sticking out.. so I won't cover it up with chocolate next time.) Don't you think?

Of course.. I didn't want to waste a drop, so I ended up dipping some of Tyler's banana chips in the chocolate halfway. It's beautiful!

Now we have plain chocolate candies (in the green mold) and multiple choices in the blue molds. I think Tyler will be pleasantly surprised tonight.

... I still can't believe I didn't even taste a little. Not even a bit. Not even when it was on my hand or the spoon or any remaining bits in the bowl. I have to say, that was the WORST thing about this fast. Who makes candy and then can't lick the bowl?

Thursday, April 7, 2011

Spring-cleaning (my yearly fast)

I felt so great after my fast last year, that I've decided to make it a yearly thing. Yes, I know.. people seem to think they're going to starve if they skip one meal. But the truth is, most Americans could skip a dozen meals and be a better, healthier person for it.

flowers

So, I'm working on a little spring body-cleaning myself!

My last meal was last night, Wednesday, at dinner. I gave up coffee and alcohol since the weekend. And you learn something new everyday, don't you? Apparently, I was addicted to my daily coffee!.. because I had the worst caffeine headaches for a few days. Whew. Glad that's over. And I'm glad I didn't wait until my fast to give it up.. or my caffeine headaches mixed with the detoxing would've been so much worse. Yikes.


OBSERVATIONS

DAY ONE, Thursday: I'm hungry, but not starving. It's to be expected when you skip breakfast and lunch. I did drink a glass of unbelievably salty water. It's a natural laxative and will help me start anew. I'm filling up on carbonated water. You'd be surprised how much it helps with hunger! Honestly. And the hunger only lasts about 2 days, anyway. Then on to the good stuff!

My salty water helped clean out my digestive tract. But I'm also doing a saline enema a few times. Your intestines completely shut down when you don't eat (that's the idea).. so you want to get all the excess food out of there, so it doesn't sit and ferment. Enema #1 today.


DAY TWO, Friday: about 36+ hours in, I'm feeling fine. A little tired. But not hungry! If I can stomach it later I'll drink another glass of salt water.

I felt a little growling around my usual lunch time, 11. But it wasn't much. My stomach is just wondering where my regular Flying Burrito is. And I've gotta tell you.. I'm looking forward to how great it'll taste next week!

Afternoon on the second day and my stomach is really growling. I did finally have my second salt-water glass today. But I must be nearly on empty by now. So, I'll just keep drinking water. And adding a few granules of pink salt and squeeze of fresh lemon everyday.. gotta keep those electrolytes up. But otherwise, things are going unbelievably well. The last time I fasted I was very sick (colitis) so I felt bad all over, not just from fasting. But this time I'm healthy - and I want to keep it that way. Fasting when you're well is super easy, people. I promise!

48-hours down! Woohoo! Feeling great. Tyler's dinner sure did look and smell great. Though, smelling food has been making me feel like I ate as well. And the first few days are the hungriest. So.. we'll see what tomorrow brings. Also did enema #2 today.


DAY THREE, Saturday: Well, today didn't go as I planned. But it could've been much worse. Usually my cramps knock me down for the count but today was actually... tolerable. Weird. I only fasted for two days before this, so I don't know how it could've affected my cramps this much, but it did. And I'm elated!


DAY FOUR, Sunday: I woke up feeling great today! Not hungry. Not empty. Just great. What a feeling! We even went shopping today. Can you believe that? I didn't even splurge on all those foods you end up buying when you go to the store hungry. (Though, honestly, I had to stay away from the Rice Dream freezer section or I might've killed for one of their frozen, ready-to-eat treats.)

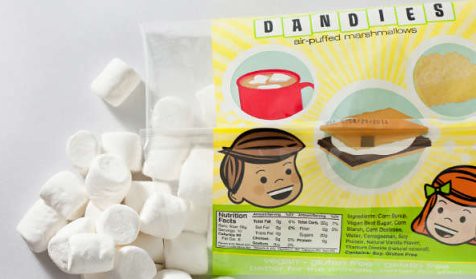
We stocked up on nutritional yeast, millet, whole grain bread for Tyler, organic oranges, apples, bananas and russet potatoes (I'm craving mashed potatoes!)... though, we are planning a romantic camping trip next week and did buy ingredients for smores. Oh yes, smores. It's a delicate treat that we have once every five years it seems. And it's about time! Dandies marshmallows (they're vegan, so they're just like cheap marshmallows but they don't contain animal skins), dark, organic chocolate and some graham crackers - it's a new brand, but I'm sure if the local health food store ONF carries it, it'll be good.

I think once I hit day 5, I'll feel like I'm over the hump. Isn't it surprising how talking about food, and shopping, and smelling my husband's meals.. is actually helping?

I feel great. I look great. I'm not even too tired.. even without food for 4 days. See.. anybody can do this. Well, anybody without children or, if you do have kids, if you have someone to care for the children for a week. But I went outside today, got some exercise (not too much) and back home relaxing again.

You have to take care of yourself first. Otherwise, how can you take care of another human being?


DAY FIVE, Monday: I woke up feeling absolutely fantastic today! Enjoying my water with a little salt and a little lemon for breakfast. But I don't think I drank enough. My stomach is finally growling a little. It's okay, though.. a little growing stomach never hurt anyone! So, off to get a large glass of plain, filtered water. It's time for enema #3, too.

Afternoon and feeling fine. Though I must admit I wanted to crack today.. not because I'm hungry, but because our food tastes soooo good! Have you tried these recipes? Then you know what I mean. I'm looking forward to raw sushi (also in the blog), pizza with daiya, veggie dogs this weekend, smores.. you name it! No, we actually don't normally eat veggie dogs and smores but we're going camping to celebrate our anniversary. Yay!


DAY SIX, Tuesday: Well, it's about 3 am and I'm awake. I noticed (and read about) how much less you sleep when you eat raw foods exclusively.. and I did notice that when we ate raw foods. But maybe you sleep even less when you fast? Ani Phyo's raw food cookbooks talk a lot about the benefits of raw foods, one being less sleep required because your body doesn't have to work so hard to digest all of your foods. And since I'm not digesting anything right now, it stands to reason that I wouldn't need much sleep, right?

Feeling great! Not hungry. And as of now, I have only 41 hours to go! Woohoo!

It's after noon and I figured I would be asleep by now. I'm not sleepy, though. Weird. I am, however, ecstatic to say that day 6 is nearing conclusion! A mere 8 hours left! I can finally see the light at the end of the tunnel.

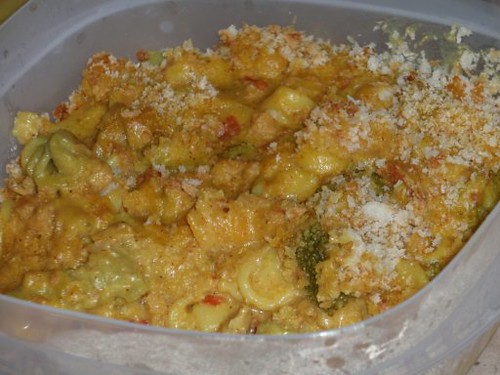
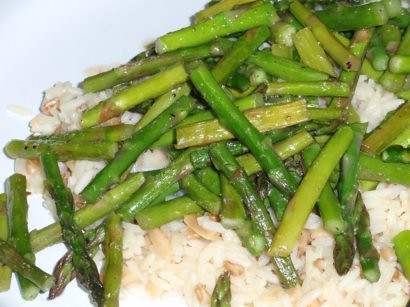
So, I've figured out the first two days are the hungriest. The third and fourth day are the weakest. But after that, you feel completely normal again. I still enjoy seeing what Tyler makes for dinner. And luckily, ahead of time, I made two of the you-can't-screw-this-up mac n cheese recipes.. one original, one Mexican-style. So, there's no excuse for him not eating right while I'm fasting!

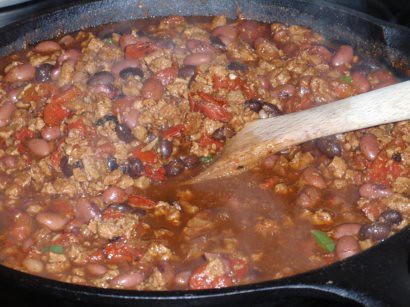
And today I'm busy making a shopping list and packing list for camping. We don't have any chili or relish. And I want to spice up the dogs. Chili sounds fantastic right now!

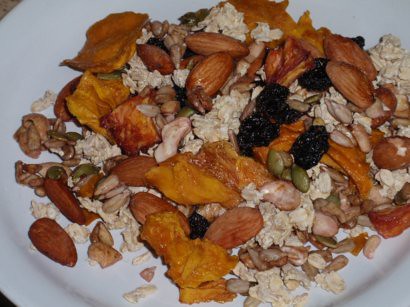
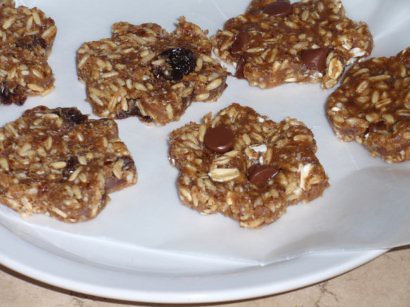
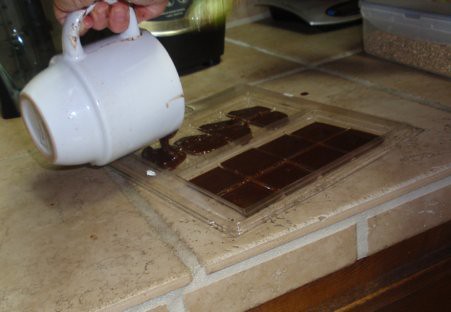
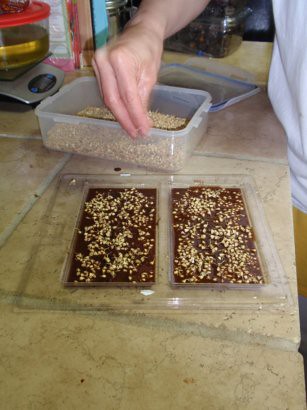
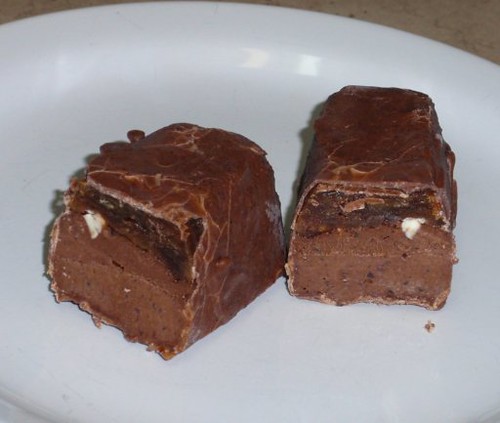
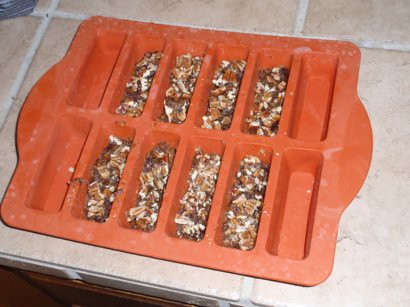
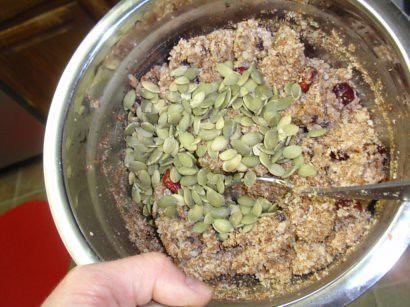
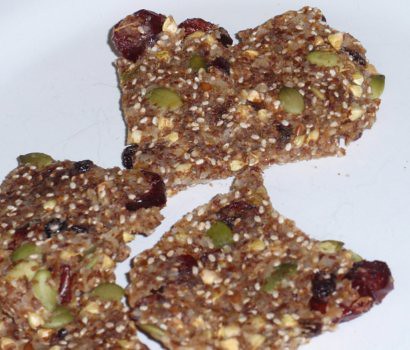
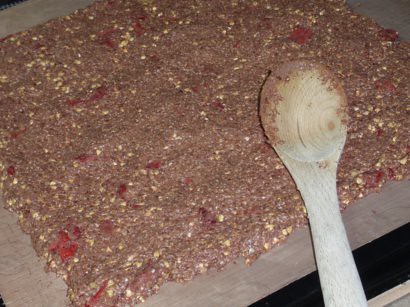
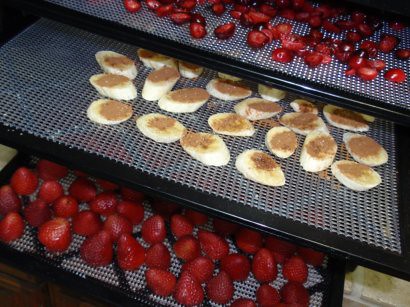
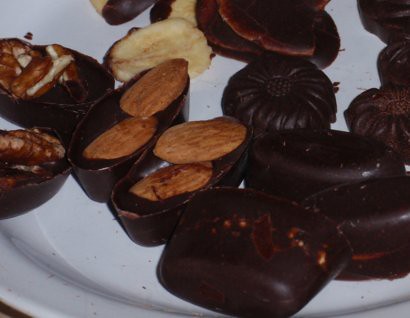
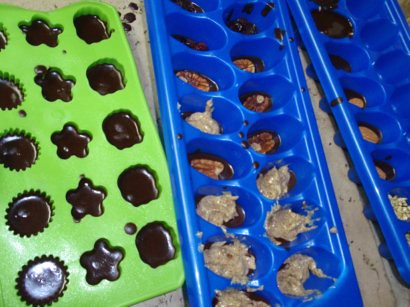
So.. today is almost over.. and I did manage to make the beans for the chili tomorrow. And, believe it or not, I made a LOT of chocolate candy. (See next post.) I honestly don't know how I did it. I wanted to taste the chocolate.. because I'm a choco-holic. But I wasn't even hungry. This is so weird!


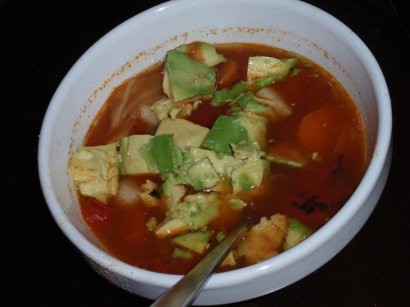
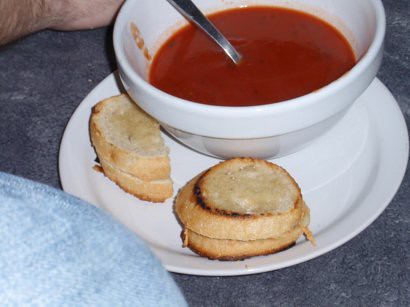
DAY SEVEN, Wednesday: What a fabulous morning. Yesterday was the best day I've had on the fast.. which makes me see how people can, when necessary, fast for 2-3 or even more weeks at a time. You really do feel better as time goes on. I feel great today, am enjoying my morning carbonated water.. and looking forward to mashed potatoes and soup tonight!

. . . .

I'm counting down the hours! In just two hours I'll start a homemade, from-scratch soup. Hmm hmm good.

. . . .

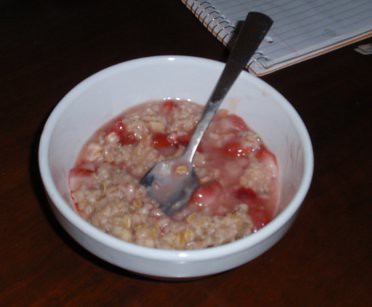
Nothing new to report. The fast ended quite easily with a very-cooked bowl of unbelievable soup (see next post.) Wow, I feel great! I have to admit, some days I really wanted to break the fast because I was just bored of not eating. Who knew that could even happen? I wasn't hungry most of the time.. I just missed the taste of our cooking!

So.. it's back to my normal eating. Though, I do plan to concentrate on more raw foods. I've been doing a lot of research and reading while fasting and have some up with some wonderful (hopefully!) bread-type recipes.

Here goes nothing!


REQUEST

Like my blog? Please recommend it to your friends!

Wednesday, April 6, 2011

You-can't-screw-it-up Mac n Cheese

Every time I make this delicious meal, it's always a little different. Sometimes I'll add a different vegetable.. sometimes I'll add extra spices.. sometimes I'll make it Mexican-style.. sometimes the original broccoli and pasta version hits the spot.

Either way, try not to eat the entire pan!

P4060762

I know my pictures aren't the fanciest.. but the food is definitely the yummiest. I promise.

INGREDIENTS

2 c macaroni, your choice
2 c sliced broccoli

1/2 c margarine

1/2 c flour

2 3/4 c boiling water (it is important to start this boiling before you begin)
1-2 t salt
2 T soy sauce
1 1/2 t garlic powder
dash turmeric
dash paprika
1 c nutritional yeast flakes

3/4 c tvp
1 can rotel (mild, medium or hot)
1/2 c water
optional spices: 1 T chili powder, 1/2 t coriander, 1/2 t cumin

DIRECTIONS

It's pretty important that you read through the instructions BEFORE beginning. There are a few important steps you don't want to forget.

Before you begin, preheat your oven to 375.

Step 1: boil 2 cups pasta. Al dente steam the 2 cups of veggies. Don't overcook! Remove from stove, drain. Have ready to add to mixture at the end.

Step 2: start the water boiling. I use silicon measuring cups, so I just fill my teapot with extra water and measure the right amount when I need it. If you need to, measure the water into a pot and start it boiling with a lid. You don't want to lose your water!

Step 3: cook the tvp, rotel and 1/2 c water together for about 5 minutes. Don't cook longer.. you don't want soggy tvp! Add spices if you chose. Remove from heat when cooked al dente (about 5 minutes or less).

Step 4: measure out your flour, yeast and spices. Have them ready! While the water is boiling, put the margarine in your trusty cast iron skillet. When it's melted, you're going to add the flour a little at a time. Continually whisk until absorbed into the margarine. Now, little-by-little, add the boiling water. KEEP WHISKING. You want this to be a smooth, whisking process. Whisk until bubbly again.

Step 4: now add salt, soy sauce, garlic, turmeric to the mixture. Now add the tvp mixture and continually whisk. Yes, keep whisking. It'll be over soon! (And worth every second of whisking.)

Step 5: this is when you'll add the pasta and broccoli.

Be careful! At this point my skillet was nearly overflowing! Gently fold the broccoli and pasta into the goo. Oh, it's a beautiful goo!

Step 6: bake at 375 for about 8 minutes. Add bread crumbs to the top (if you desire) and cook a few more minutes. Watch so that it browns.. and remove from oven.

Try not to burn your tongue!

I like to serve this with tortilla chips and an ice cold beer. See, vegans indulge in the richer, finer things in life.

Enjoy (guilt-free)!

IMPORTANT NOTES

I know it seems a little tedious at first. But the more you make it, the easier it'll get. I made a huge mess the first time I made this! Oh wait, I made a huge mess this time, too. What can I say, I enjoy enjoying my kitchen!

Make a mess. Have fun. Get in there.

To-die-for asparagus and pilaf

In case you can't tell.. we've been lazy this week. Meals are easy, simple - but super duper tasty and healthy.

Meet the easy asparagus and pilaf. It was AMAZING!

P4050739

I keep telling people that we eat like kings.. but that's just not true! We're healthy, happy and eat zero cholesterol. Our meals center around vegetables and spices. Either way, I feel like royalty when we sit down to a meal. It's never without spice or spunk or taste. We LOVE food. Can't you tell?

INGREDIENTS

1 bunch asparagus
1-2 T olive oil
As much pepper as you can grind
1/2 - 1 t salt (pink is what I use)
1/2 t cayenne powder (this is crucial!)

DIRECTIONS

Take out your trusty cast iron skillet and heat about 1-2 T oil. You don't need much.

Have your asparagus washed and sliced into about 2" strips.

Once the skillet is hot, throw in your asparagus and stir around in the hot oil. Really, this small amount of oil will cover all of your asparagus nicely. Sprinkle the salt, pepper - and don't forget the cayenne! You don't want a ton of cayenne.. but just enough to give it a kick.

Trust me, it gives the asparagus another dimension of flavor. It's fantastic!

To make this meal easy (our theme this week) we served adopt the almond pilaf by 'Near East'. Easy, right?

Service size: two of us can eat an entire bunch of asparagus or an entire box of Brussell Sprouts on our own. You should, too!

Best Brussell Sprouts

P4040714

If you aren't a fan of Brussell Sprouts.. it's only because you haven't cooked them properly. You probably had them boiled or steamed, right? I'm pretty sure that's how I was introduced to them as a child. Unfortunately, American meals used to center around gross, artery-clogging meats and cheeses.. while the veggies were wilted and soggy on the side.

Well, no wonder America is in the state that it's in! Soggy gross veggies are an insult to your taste buds. The sprout deserves better, and so do you.

I am a hardcore Brussell Sprout fan. They are easy to cook. They smell great while they're grilling. I can barely contain myself. I always make the excuse that I have to taste them as they're cooking.. because I can't ever wait until they're done.

That's how much I Brussell Sprouts. And you will, too!

INGREDIENTS

1 container of Brussell Sprouts
1-2 T olive oil
As much pepper as you can grind
1/2 t + sea salt (or salt of your choice; I have been favoring pink salt lately)
1/2 c water

Brussell Sprouts don't require much preparation. And they cook quite quickly.

DIRECTIONS

I use my large cast iron skillet for this one. While I'm pre-heating the pan with 1-2 T olive oil, I slice and rinse my sprouts. Basically, cut off the bottom. And peel off the outer later if damaged. Now, slice in half down the middle.

Begin placing the sprouts, sliced-side down, into the warming oil. Once you hear it sizzling a little and all sprouts are in the pan, pour the 1/2 c water over the sprouts. This is when I put a lid (it's too small for the skillet but covers most of the sprouts) on top. Let them cook in the water until it's all evaporated. This won't take as long as you think. So, watch!

Sprinkle with pepper and salt.

Remove the lid once you see the sprouts cooking through. They will begin to look a tad see-through.

Once the water is evaporated, now you're going to cook the sprouts until they're browning on the bottom. Again, this won't take as long as you think.

Tada! You're done.

OPTIONS:

Cook a box of pilaf (we used the lentil 'Near East' box for a quick meal.) You can also serve with brown rice. Or a pasta of your choice. I bet these sprouts would be great with the mac 'n cheese I made last month!

Monday, April 4, 2011

Comforting grilled cheese and tomato soup

P4020691

This is another one of those posts that I just can't even pretend contain a recipe. This is too easy!

I am a fan of soup. I love it. Tomato soup, veggie soup, beany soup.. you name it. We made soup in our own homemade bread bowls last week! There seems to be limitless variety when it comes to soup.

But isn't there still something comforting about an old favorite like tomato soup with grilled cheese?

This is why we keep a package of Daiya on hand (yes, you can purchase this at Cooks in Rogers.) We also love Teese but can't seem to get it in town anymore! Another favorite, Sheese, has to be ordered online. And we do, but not regularly. If only we could get that at the local store! There's nothing better than Sheese and crackers. Truly. yum yum

But back to the grilled cheese. Good bread is CRUCIAL. Don't skimp on the bread. If your bread is square and sliced.. throw it out and never buy it again! Shame on you! There are so many yummy breads - and many bakeries will slice it for you. Either way, stay out of that nasty bread isle and opt for something more fresh. You won't regret it.

Slice your bread, add some Daiya and grill. Serve with your favorite tomato soup (for optimal taste and nutrition avoid the creamy varieties, of course.)

See how easy that is?

Hot twist on a classic

We love dehydrated kale. You will, too.. once you try it. Have you? WHY NOT?! Once you do, you'll wonder why you waited.

Trust me!

P4020688

This time I fit an entire bunch of kale per tray. I've found out that you don't really have to spread them out on the tray. But you do want them to be spread out enough to catch all of the spices you're throwing on top.

INGREDIENTS

1 bunch kale (this will not be enough, but just double or triple this recipe!)
Nutritional yeast
Raw salt of your choice
Cayenne
Olive oil

DIRECTIONS

For each bunch of kale, tear it apart and remove most large veins. You want these to be basically chip-sized. Throw these torn bits into a colander in the sink. Once you've filled it, rinse.

THIS STEP IS CRUCIAL: you must dry the kale in a hand towel. Each time you wash and shake them.. you still have to dry them with a towel. You don't want water hanging around on the leaves.

Now, transfer to a large bowl and toss olive oil on top. For each bunch of kale, that can vary from 2T to even 1/8 cup. But you can always add more, so start with less. Now, dig in! You're going to rub oil on each leaf, in each cravasse. Not a ton of oil, but as long as each leaf is shiny with a tiny bit of oil, that's enough.

Bunch of the leaves on the tray. Now, douse it with nutritional yeast. I mean, use a LOT. The more, the better.

Sprinkle with raw salt, all over. Normally, this is where I'd say you can stop. But this time we added paprika and cayenne all over the leaves.

It was great!

You can experiment with your favorite spices. Just think of what types of chips you prefer. Try those spices! Really, I don't think you can go wrong with kale.

Breakfast of Champions

P4020696

Just because you're vegan doesn't mean you can't have that yogurty-yummy taste.

I love Wildwood yogurts.. and they are sold in these large containers. So you can open it and enjoy it all week long!

Though I wouldn't call this a recipe, I wanted to share you this awesome breakfast (or snack!)

INGREDIENTS (approx)

3/4 c yogurt
1/2 c cereal (I used Kashi)
1/2-3/4 c sliced fruit

Have friends over? Serve in a glass or clear container.. and wow your guests!

Spicy, cheddary nom noms

P4040708

I love this cheese. I put it on sandwiches, burgers and I'll dip anything into it!

INGREDIENTS

1 c raw cashews
1/4 c water
1 4oz jar pimientos
1/2 t raw salt (I used pink)
1/2 t paprika
1/2 - 1 t cayenne

Add ingredients to your high-speed blender. If you don't have a powerful blender, soak the cashews for 1-4 hours. Then blend everything together - but maybe add a little less water.

This cheese has a kick! Keeps in the fridge for several days. Though, I eat it so fast that one batch never lasts more than 3-4 days.

You will LOVE this! And it's so easy to make. SO easy!

Super Hot Super Fried Super Wings

P4020694

These really are easy! But don't expect them to be healthy. They sure are tasty though.

INGREDIENTS

Seitan (frozen or in a can or however you prefer it)
Hot sauce
Margarine
Flour (+ optional spices) for breading
Celery
Dip: goddess dressing is best; sour cream if you prefer


First, you'll want to drain your seitan and make sure it's thawed if frozen.

Now, have two bowls side by side: water in one, flour and spices for breading in the other. Now, take each piece of seitan into water bowl, then flour bowl, then back to water, then to flour, do it a third time if you want a super thick breading!

Bread several pieces. Have your oil hot, hot, hot.

You're going to deep fry these things. So, only fry a few at a time. Each time you add a piece to the oil, the temperature lowers. So, you want it to be as hot as possible each time.

Put each piece on a napkin after frying. Excess oil will drain off.

Once you've fried all the pieces you want.. now is for the even messier part! Melt your margarine and add hot sauce to make a sticky, gooey mess. You're going to smother each piece in the margarine/hot mixture.

It's HOT.. HOT... HOTTTT!

This is where the sliced celery and dip (Better Than Sour Cream or Goddess Dressing) save the day.

Enjoy!