Thursday, September 29, 2011

Peanut Butter Cuplets

Very Reese's Peanut Buttercup-esque!

peanut butter cups

On the sweet side. With a little healthy fat. (Don't be afraid of a little fat!)


Serves 2

INGREDIENTS
3 dates
1 T fresh peanut butter (appoximately)
Chocolate syrup

Slice your dates into halves, then again. Lay on a plate. They should look like little triangular cups at this point.

Use the cup side of each date to scoop in a little peanut butter. (Or more if you like!)

Make your chocolate syrup and drizzle on top. (The recipe link sends you to a large batch of chocolate. You can make it and use it for a few days - or simply make a very small amount of the recipe. It's easy to make small batches at a time, trust me.)

Enjoy!

Variations: Try any nut butter you like. Almond, soy nut.. it doesn't matter. Every combination will taste a little differently.

Want a lower calorie, totally raw version? Try my very first recipe.

Creamy Soup Without Cream

No, really.

creamy soup

With the weather turning cooler, I have been craving soup. But even as wonderful as homemade soups taste... variety is still important. (Second only to fresh, fragrant spices!)

So, how do you make a creamy soup without cream? Easy!

Make your soup like you always do. Then, simply remove a few cups of soup and blend. Then pour back into your soup. It really is that easy.

Is there a veggie you want your family to eat but they won't? Blend that one! They won't even know it's there. Promise.

Wednesday, September 28, 2011

Sweet Seaweed Snack

sweet kelp

I don't know what I can say about this except... WOW!

Get some.

Get it now.

Enjoy.

Wow. I think this calls for some sweet nori recipes. Sound good?

Weekend Waffles

How do we celebrate saturdays and sundays? With waffles!

oatmeal waffles

I know this waffle isn't written in my usual style but this is my husband's recipe. He is the waffle master. You want your batter to be pretty thick. So add liquid as necessary but don't make it too runny.

How to make it super yummy? For two waffles, cover them with a shared diced peach, several strawberries and half a large banana.

Don't forget: Use only 100% maple syrup.

INGREDIENTS
About 1 c oatmeal flour
1/2 c wheat flour
1 flax egg replacer
Vanilla, a little
Oil, a little (place a little in the waffle maker, too)
Proofed yeast in 1 tbsp sugary water (about 100 degrees)
Add 2 c almond milk

Use your waffle maker! This will make 2 waffles.

VERSION 2:
Replace oatmeal flour with regular flour.

Eat More Soup

Who loves soup? ME!

soup

So, I am always throwing together tasty, spicy, herby yumminess. It's easy. Trust me.

Today's specialty:

About 8 cups of water (I filled my pot halfway to leave room for veggies)
1 russet potato, diced small, skin on
1 organic carrot, sliced, each piece cut in half
2 celery stalks, diced
1 large tomato, diced
Bean sprouts, placed in bottom of each person's bowl
Optional: 2 slices jalapeno (to kick it up a notch!)
Spices:
2 teaspoon veggie bouillon of your choice
1 heaping teaspoon each garlic, paprika, oregano, basil, onion powder.
1/2 teaspoon cayenne

OPTIONS:
Cube tofu and add about a half block
Sliced broccoli
Sliced cauliflower
Brown rice
Beans (black, red or any variety)

Don't be afraid to use what you have!


Step 1:

Boil water. Add potato + carrot. Boil for about 10 minutes. (These veggies need more time to cook.)

Step 2:

Now add tomato, celery (and any other veggie you'd like to add to your soup). Cook another 5 minutes. Now add all of your spices. Cook another 5-10 minutes. Fork your potatoes and carrots to make sure everything is cooked to your liking.

Add cooked rice and beans for 5 or more minutes at the end. They should already be cooked when you add them, so you're just re-heating them.

Step 3:

Put bean sprouts in bottom of bowls and spoon soup on top. Serve immediately. Yum!

Thursday, September 22, 2011

Sweet Potato Chili

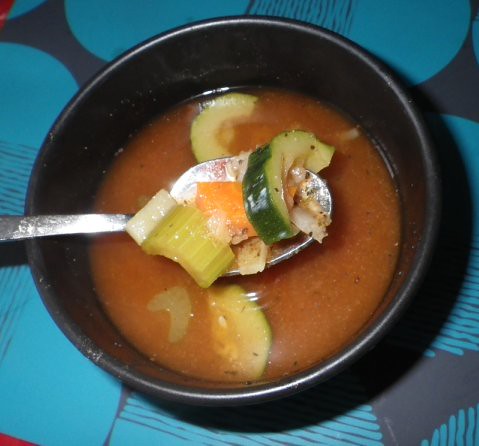
Winter is almost here in Colorado... and the cool breezes make me crave hearty foods. Next week? Dosas! But for now, I decided to use my yummy sweet potatoes in a way that I don't usually: chili. That's right. Not a sweet chili, either. It's a hearty, healthy, yummy mouth-gasm. You'll adore this chili!

sweet potato chili

INGREDIENTS
1/2 c dried brown rice + 1 c water
1 medium sweet potato, peeled and diced small
1 can black beans, rinsed thoroughly
2 cups canned, diced tomatoes (I used fire-roasted by Muir Glen)
Approximately 4 T olive oil, depending on how heavy you'd like your chili
1 small onion or 1 t onion powder
3 cloves garlic or 1.5 t garlic powder
3 t ground cumin
1 t cayenne
1/2 t salt (I used pink Himalayan)
1.5 c water
Juice of one juicy lime
1 t flax (optional)
2 t dried cilantro or 2 T fresh cilantro


DIRECTIONS

Step 1: Brown rice to the rescue.

To begin, put 1/2 c dried brown rice and 1 c water in dried pot. Bring to boil. Then return to simmer. Keep the lid on until they're done.

Step 2: On to the chili.

Heat 3-4 T olive oil in your trusty cast iron skillet. (If you don't have one yet.. what are you waiting for?) Peel and dice your medium sweet potato. OPTIONAL: You can decide to add 1 small onion, diced small, right now. Or add onion powder later - it's your choice. Cook the potato (and onion, if used) about 5-6 minutes. They should start getting soft. Now, add 1.5 c water. Stir.

Step 3: Spice it up!

Add your spices. To counteract the sweetness of the potato, and depending how strong your spices are, you may want to add more (or less). I think the sweetest of the potato reacts well to all of the spices.

Stir in:
1 heaping t garlic powder or 4 cloves
2+ T chili powder (don't skimp!)
1 t dried onion (only if you didn't add onion in the beginning)
1 T ground cumin
1 heaping t paprika
1 t cayenne
1/2 - 1 t salt
1 T nutritional yeast (optional)

Cook about 10 minutes, or until potatoes are nearing the stage you want to eat them.

Step 4: Finish it up.

Now, add juice of one lime. Add your VERY RINSED can of black beans. Also, add your 2 c fire-roasted diced tomatoes.

Optionally: also add 1 t flax. It's healthy and you won't even know it's there.

Cook another 5 minutes. During this time, use your wooden spoon to stir and squish some of the beans, potatoes and tomatoes. This will thicken your chili. Stir, squish. Stir, squish. Do this for about 5 minutes.

Step 5: Don't forget your rice!

By this time your brown rice should be done. (Watch it!) Stir the hot rice into your chili. Reduce to simmer and keep warm until ready.

Voila. You'll love it. Serve with tortilla chips or a hearty toasted bread. Don't forget the fresh-squeezed limeade, too. (Mix juice of 1 - 1.5 lime per glass, add about 1 t agave. Mix well with cold water.

Yum! Now that's a meal.

Tuesday, September 20, 2011

Mini Sushirrito

Bigger than sushi, smaller than a sushirrito.... it's awesome!

sushirrito

I am a huge fan of seaweed. I could eat it everyday. I LOVE it. So, when I saw the new 'sushirrito' restaurants and recipes floating around, I had to try it.

Mine doesn't qualify for the enormity of a sushirrito -- but it was WAY too big to be called sushi, either. What was it? Filling. Tasty. Yummy.

INGREDIENTS
Brown rice, cooked and cooled
Apple cider vinegar
Veggies: celery, carrots, avocado
Meats: cooked tofu, veggie burger, anything really!

I used some stuff I had around the house for this recipe and it was amazing. So, you could probably change the ingredients completely and still come up with a great meal. NOTE: One Mini Susshrito is almost enough for two people!.. especially if you're having edamame or anything else with it. Trust me. Filling.

INSTRUCTIONS
Cook your brown rice. You want it moist and semi-soft. Now, let it cool until warm. Sprinkle with ACV and mix around. Put in the fridge. You want it cold. The ACV should make it more sticky, like sushi rice. NOTE: You must use short grain, not long grain.

IMGP1278

Lay out your nori on your sushi roller. Use a LOT of brown rice. This is your meal... so pile it on! Next, I layered the broken veggie burger all the way across. Now, add your sliced carrots, celery (yum!) and avocado if you have it. This is one large sushi.. so you must have a roller! (Stop by any local Asian market .. they're about a buck. No, srsly.)

Use a VERY sharp, wet knife to slice your sushi. Or, if you've made it big like a sushiritto, you can wrap it in wax paper or a cloth napkin and enjoy like a burrito! (See.. sushirrito.)

Dip in some soy sauce + hot sauce + mustard sauce. Enjoy!

Soap nuts. No, really.

Not a recipe. Not something you can eat. But I thought it was important enough to post about.

soap nuts

We bought these little beauties from 10,000 Villages. I'm sure you've seen one of these or shopped at one. Good for you! Their employees are all volunteers and the store is fair trade. That means your purchase truly supports a family or community, rather than lining the pockets of some corrupt corporation. Sounds good, right?

DIRECTIONS
Place 10 soap nuts in the included cloth pouch. Put in a cup. Pour hot water on top. Let it sit for 10 minutes while you separate your clothes and load the washer. (You must soak the nuts.)

Pour the water and pouch into the washer after about 10+ minutes. Wash as usual. See how easy that is? You can re-use this pouch and nuts for up to 5 loads.

NOTE: The instructions called for 5-6 nuts but honestly, that wasn't enough with this batch. Who knows.. maybe this batch of soap nuts were dried or just less productive. You'll figure it out with yours. Remember, these are natural products so there is no exact recipe.

Put your used soap nuts into a compost bin or throw them under a bush for all I care! They're natural. No waste. No garbage. You rock!

Pizza dough you don't have to make yourself

Whoever said you have to make all of your food from scratch.. never lived near a Whole Foods!

IMGP0974

This $2.99 pre-made pizza dough can be found in the Whole Foods deli part of the store, near the other easy-to-grab and ready foods.

We discovered this little gem during one of our pizza-weeks. That's right, dang near entire weeks living on pizza. Can you blame us? The trick is to vary your toppings! And don't over-cheese it. That will wear you out and (dare I say) pack on the pounds!

So, with this $2.99 pack of pizza dough.. we make TWO dinners AND TWO lunches. Can you believe that?

Here's what you do:

Keep this dough in the fridge until about 6-10 hours before you're going to eat dinner. You'll want to put this on the counter (not in direct sunlight or anything). Just in a warm place where it can warm up and rise, rise, rise. Don't forget this step!

It will double, triple or even quadruple in size.. bursting out of its package.

Now, take your knife or scissors and cut it in half. Put half back into the fridge. It will be ready to use tomorrow or even the next day.

With the dough you have in your hands, press it out, flatten it out and put it into the shape you want and on your pizza pan.

Cook it for 400-500 degrees, about 5-10 minutes. I know this is vague but it will depend on the type of oven you use. Basically, you want it half-baked and becoming tan.

Remove from the oven and top with your favorite toppings!

My favorites:
Flavorful sauce
Artichoke hearts
Asparagus
Kalamata olives
Diced tomatoes
Seitan
A small amount of Daiya cheese. (I used to prefer Teese, until my local stores quit carrying it.) Daiya is definitely an acceptable option!

Bake on 400-broil, whatever you prefer. Bake the heck out of it. Seriously.

Remove when it's all toasty, bubbly and brown. This size pizza can be cut into 8 pieces. Have 2 each for dinner with a salad. Repeat with the remaining 2 pieces for lunch the next day. (Okay, when we lack fresh veggies for a side.. we've definitely indulged in the whole pizza for the meal.) Yum!

I blame my husband for my pizza addiction. It's definitely his fault. But honestly, I don't think he minds at all.